La mia sheela Ho già parlato in passato di exiftool, e di quanto...
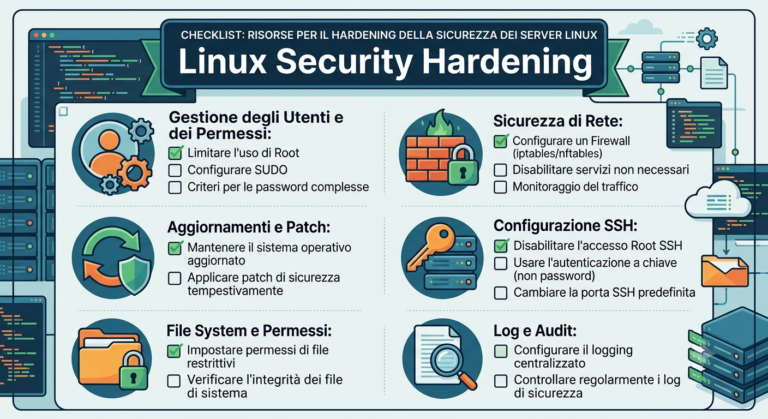
Sicurezza
Reaver WPS riesce con un attaco brute force a decifrare la password wpa/wpa2 della...
Metasploit Project è un progetto di sicurezza informatica che fornisce informazioni sulle vulnerabilità, semplifica le...
A me spesso capita che mi si blocchi la porta del cdrom e di conseguenza non si...
Questo è un periodo di vacanze e di conseguenza è anche il periodo di furti...
Questo è un piccolo trucchetto per cifrare velocemente un file. Come ho avuto modo di scrivere...
Shorewall (Shoreline Firewall) è un firewall che si appoggia al sistema Netfilter (iptables/ipchains) del kernel...
Esiste un altro modo oltre a questo per proteggere i nostri dati sensibili, e cioè...
Super Grub Disk come si sa è utilissimo, è uno di quei tool che dovrebbe essere...
All'interno di questa immagine, si nasconde un messaggio molto compromettente. La tecnica di nascondere all'interno di...
Saidar è un tool che serve per monitorare il sistema. Viene monitorato l’uso della cpu, della memoria,...
Questa è una guida per la creazione di cd/dvd criptati. Quindi, per la serie i miei dati...
Ognuno di noi, chi più chi meno, è geloso di un qualcosa, o comunque, ha delle cose...
Tutti noi conosciamo cos’è l’ MBR (master boot record), e tutti noi specialmente all’inizio lo abbiamo temuto,...