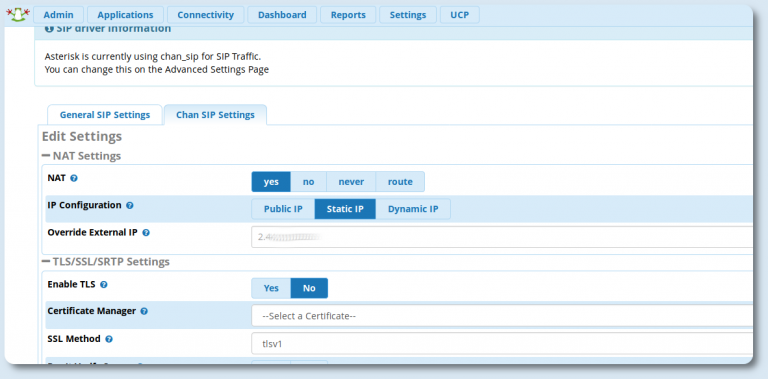
Configurazione Trunk Pjsip Asterisk su Linea Vodafone Dopo aver fatto per primo, mesi fa, una guida...
RaspberryPi

Raspberry con Owncloud Raspbian Buster Letsencrypt Apache Guida su come realizzare un proprio server cloud, utilizzando owncloud,...
Script per aggiornamento ip dinamico FreePBX Asterisk Dopo l’ultima guida su come Configurare un trunk Asterisk su...

Configurazione Asterisk su Linea Vodafone Con questa guida si completa la trilogia su come configurare ed utilizzare...

Anonsurf su Debian 10 Anonsurf è la modalità anonima di ParrotOS per forzare le connessioni attraverso Tor...

Installazione su Raspberri py 3 con OS Raspbian Stretch Lite, di Asterisk 16 e Freepbx 15....

L’obiettivo di questa guida è quello di realizzare un proprio server owncloud, e nello specifico io utilizzerò...

D-Link 5020L e ZoneMinder. Guida su come configurare ZoneMinder con telecamere D.Link 5020L Nel wiki di ZoneMinder...
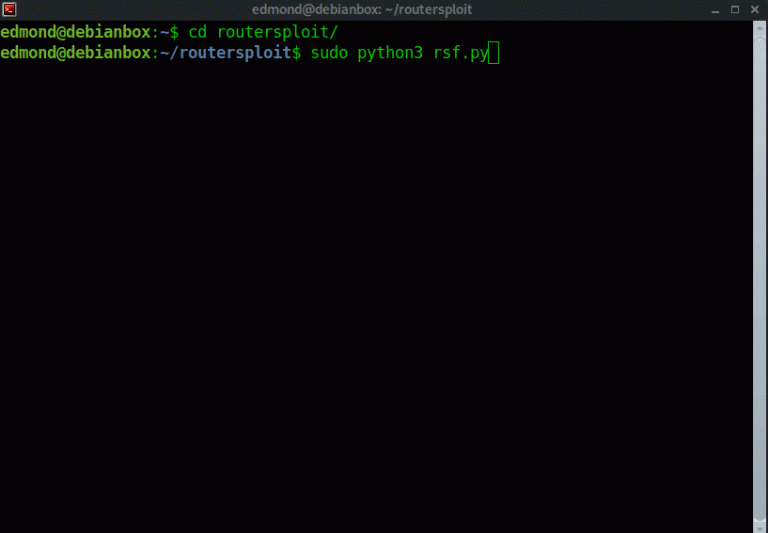
Analizzare routers e devices IoT con RouterSploit RouterSploit è uno script in python che serve ad analizzare...

Guida su come aggiornare Owncloud dalla versione 10.0.9 alla 10.0.10. Il miglior modo per effettuare l’aggiornamento è...

Zoneminder su Raspberry pi 3 B+ Raspbian Stretch Con l’arrivo del nuovo Raspberry pi 3 B+ nella...
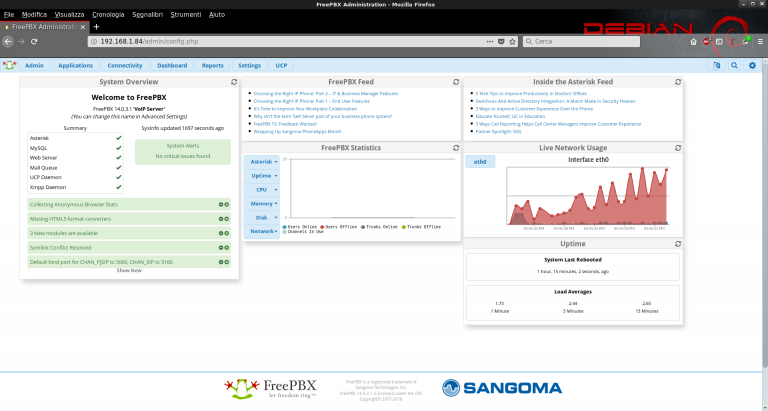
Configurazione Trunk PJSIP Messagenet Freepbx 14 Ho deciso di aggiornare il mio centralino, passando da Raspbian...

Owncloud 10 su Raspberry Pi 3 e Raspbian Stretch Guida su come installare owncloud 10 su...
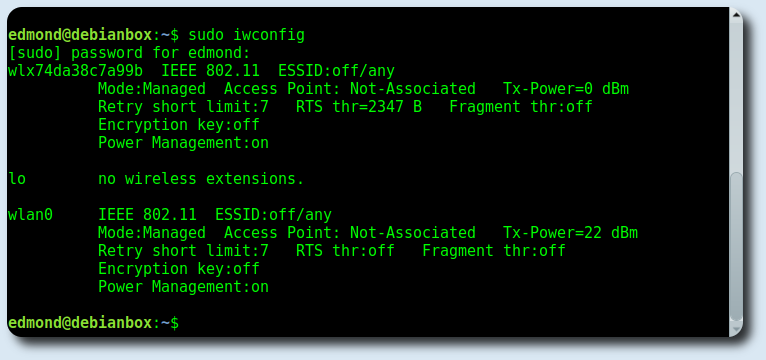
Connessione WPA2 WIFI da terminale con Wpa_Supplicant Guida su come connettersi ad una rete wifi da...