Wine error /lib/ld-linux.so.2


Wine error /lib/ld-linux.so.2

Wine error /lib/ld-linux.so.2.


Guida su come risolvere l’errore di libreria mancante (ld-linux.so.2) quando si utilizza wine. Questo tipo di errore “/lib/ld-linux.so.2: could not open” di solito si verifica quando si tenta di eseguire un programma Windows (.exe, .msi) e la libreria potrebbe non essere presente nel sistema o il percorso potrebbe essere errato.

Ecco alcune soluzioni da provare:

Assicurarsi che sul sistema sia installato il linker dinamico a 32 bit. Per verificare a quale pacchetto appartiene ld-linux.so.2, utilizzare i seguenti comandi:

$ sudo apt install apt-file
$ sudo apt-file update
$ sudo apt-file find ld-linux.so.2

output:

edmond@SysLinuxOS:~$ sudo apt-file find ld-linux.so.2
[sudo] password for edmond: 
libc6-i386: /lib/ld-linux.so.2 
libc6-i386: /lib32/ld-linux.so.2
libc6-i386-amd64-cross: /usr/x86_64-linux-gnu/lib/ld-linux.so.2
libc6-i386-amd64-cross: /usr/x86_64-linux-gnu/lib32/ld-linux.so.2
libc6-i386-cross: /usr/i686-linux-gnu/lib/ld-linux.so.2
libc6-i386-x32-cross: /usr/x86_64-linux-gnux32/lib/ld-linux.so.2
libc6-i386-x32-cross: /usr/x86_64-linux-gnux32/lib32/ld-linux.so.2
libc6-sh4-cross: /usr/sh4-linux-gnu/lib/ld-linux.so.2
libc6-sparc-sparc64-cross: /usr/sparc64-linux-gnu/lib32/ld-linux.so.2
libc6-sparc64-cross: /usr/sparc64-linux-gnu/lib64/ld-linux.so.2
libc6.1-alpha-cross: /usr/alpha-linux-gnu/lib/ld-linux.so.2

eventualmente installarlo o reinstallarlo:

$ sudo apt-get install --reinstall libc6:i386

Verificare il percorso corretto, che si trova in /lib/ld-linux.so.2

$ ls /lib/ld-linux.so.2

Se non esiste, estendere la ricerca a tutte le cartelle, in particolare a /usr/lib32, oppure /usr/x86_64-linux-gnu/lib32/ e poi creare un link simbolico a /lib:

$ sudo ln -s /usr/x86_64-linux-gnu/lib32/ld-linux.so.2 /lib

a questo punto rilanciando di nuovo wine il problema dovrebbe essere risolto.

Wine error /lib/ld-linux.so.2

enjoy 😉


Sparrow wifi su Debian 12


Sparrow wifi su Debian 12


Sparrow wifi su Debian 12


Sparrow wifi secondo me è uno strumento indispensabile per tutti quei professionisti e non solo che vogliono conoscere e controllare tutti gli aspetti della rete wifi. In pratica riunisce in una Gui tutte gli strumenti per la scansione wifi, bluetooth e gps. Maggiori informazione si trovano nella pagina del progetto. Questo fantastico strumento io lo ho inserito di default in SysLinuxOS for System Integrator. Per installarlo su Debian 12 seguire i passi successivi.

Prerequisiti
$ sudo apt-get install python3-pip gpsd gpsd-clients python3-tk python3-setuptools
Installazione moduli aggiuntivi
$ sudo pip3 install --break-system-packages QScintilla PyQtChart gps3 dronekit manuf python-dateutil numpy matplotlib

Download ed avvio

$ git clone https://github.com/ghostop14/sparrow-wifi
$ cd sparrow-wifi
$ sudo ./sparrow-wifi.py


Sparrow wifi su Debian 12

Sparrow wifi su Debian 12

enjoy 🙂

Edge Browser su Debian 12


Edge Browser su Debian 12

Edge Browser su Debian 12


Microsoft Edge è un browser web basato su Chromium, sviluppato da Microsoft. Su SysLinuxOS è già presente di default, ma per installarlo su Debian 12 seguire i passi successivi.

Prerequisiti
$ sudo apt update && sudo apt upgrade
$ sudo apt install software-properties-common apt-transport-https ca-certificates curl -y
Download GPG Keys
$ curl -fSsL https://packages.microsoft.com/keys/microsoft.asc | gpg --dearmor | sudo tee /usr/share/keyrings/microsoft-edge.gpg > /dev/null
Aggiungere repo
$ echo 'deb [arch=amd64 signed-by=/usr/share/keyrings/microsoft-edge.gpg] https://packages.microsoft.com/repos/edge stable main' | sudo tee /etc/apt/sources.list.d/microsoft-edge.list
Installazione
$ sudo apt update
$ sudo apt install microsoft-edge-stable


Edge Browser su Debian 12

enjoy 😉

Google Chrome su Debian 12


Google Chrome su Debian 12


Google Chrome su Debian 12


Google Chrome è un browser web sviluppato da Google. È il browser web più utilizzato al mondo, con una quota di mercato del 65%. Browser multi piattaforma è presente di default su SysLinuxOS, mentre per Debian 12 seguire i passi successivi.

Prerequisiti
$ sudo apt update && sudo apt upgrade
$ sudo apt install software-properties-common apt-transport-https ca-certificates curl -y
Download GPG Keys
$ curl -fSsL https://dl.google.com/linux/linux_signing_key.pub | sudo gpg --dearmor | sudo tee /usr/share/keyrings/google-chrome.gpg >> /dev/null
Aggiungere repo
$ echo deb [arch=amd64 signed-by=/usr/share/keyrings/google-chrome.gpg] http://dl.google.com/linux/chrome/deb/ stable main | sudo tee /etc/apt/sources.list.d/google-chrome.list
Installazione
$ sudo apt update
$ sudo apt install google-chrome-stable


Google Chrome su Debian 12

enjoy 😉

Teamviewer su Debian 12


Teamviewer su Debian 12


Teamviewer su Debian 12


TeamViewer è un software di accesso remoto e condivisione dello schermo che consente agli utenti di connettersi a un altro computer da remoto. È uno dei software di accesso remoto multi piattaforma più popolari al mondo, con oltre 1 miliardo di download. Alla pari di AnyDesk è installato di default su SysLinuxOS, mentre per Debian 12 seguire i passi successivi.

Prerequisiti
$ sudo apt update
$ sudo apt upgrade
$ sudo apt install curl apt-transport-https
Download GPG Keys
$ curl -fSsL https://download.teamviewer.com/download/linux/signature/TeamViewer2017.asc | sudo gpg --dearmor | sudo tee /usr/share/keyrings/teamview.gpg > /dev/null
Aggiungere repo
$ echo "deb [arch=amd64 signed-by=/usr/share/keyrings/teamview.gpg] http://linux.teamviewer.com/deb stable main" | sudo tee /etc/apt/sources.list.d/teamviewer.list
Installazione
$ sudo apt update
$ sudo apt install teamviewer


Teamviewer su Debian 12

enjoy 🙂

WineHQ 8 su Debian 12


WineHQ 8 su Debian 12


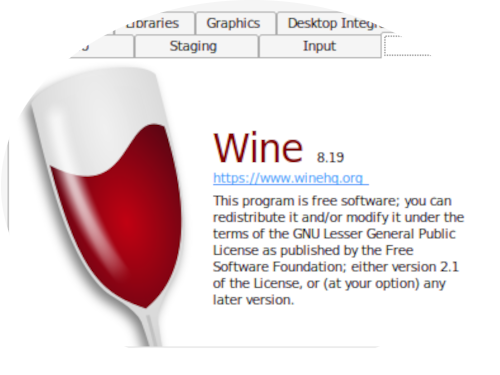
WineHQ 8 su Debian 12


Guida su come installare Winehq 8.19 su Debian 12. Wine è in grado di far girare alcune applicazioni native per Windows, sotto Linux, BSD, OSX. Su SysLinuxOS 12 winehq è installato di default.

Abilitare architettura 32bit
$ sudo dpkg --add-architecture i386
Download GPG Keys
$ sudo mkdir -pm755 /etc/apt/keyrings
$ sudo wget -O /etc/apt/keyrings/winehq-archive.key https://dl.winehq.org/wine-builds/winehq.key
Aggiungere repo
$ sudo wget -NP /etc/apt/sources.list.d/ https://dl.winehq.org/wine-builds/debian/dists/bookworm/winehq-bookworm.sources
Installazione
$ sudo apt install --install-recommends winehq-stable
$ sudo apt install --install-recommends winehq-staging


WineHQ 8 su Debian 12

enjoy 😉

Fast-cli speedtest da terminale Debian 12


Fast-cli speedtest da terminale Debian 12

Fast-cli speedtest da terminale Debian 12


Il sito Fast.com per misurare la connessione internet, è un servizo a cui provvede Netflix per far verificare se si è in grado di visualizzare i loro contenuti. Prima esisteva una versione di fast-cli, che adesso non sembra più funzionare. Questa nuova versione misura la sola velocità in download.

Installazione Debian 12 e SysLinuxOS
$ wget https://github.com/ddo/fast/releases/download/v0.0.4/fast_linux_amd64 
$ sudo install fast_linux_amd64 /usr/local/bin/fast
$ fast


Fast-cli speedtest da terminale Debian 12

enjoy 🙂

AnyDesk su Debian 12


AnyDesk su Debian 12


AnyDesk su Debian 12


Guida su come installare AnyDesk, su Debian 12 Bookworm. AnyDesk è un alternativa a Teamviewer, ed è uno strumento veloce ed affidabile per il controllo remoto. Su Debian 12 può essere installato via repository, mentre su SysLinuxOS 12 è installato di default.

Prerequisito
$ sudo apt update
$ sudo apt upgrade 
$ sudo apt install software-properties-common apt-transport-https dirmngr ca-certificates curl -y
Download GPG Keys
$ curl -fsSL https://keys.anydesk.com/repos/DEB-GPG-KEY | gpg --dearmor | sudo tee /usr/share/keyrings/anydesk.gpg > /dev/null
Aggiungere repo
$ echo 'deb [signed-by=/usr/share/keyrings/anydesk.gpg] http://deb.anydesk.com/ all main' | sudo tee /etc/apt/sources.list.d/anydesk.list
Installazione
$ sudo apt update
$ sudo apt install anydesk


AnyDesk su Debian 12

enjoy 🙂

VirtualBox 7 su Debian 12


VirtualBox 7 su Debian 12


VirtualBox 7 su Debian 12


Guida su come installare VirtualBox 7 su Debian 12 Bookworm. A  differenza di SysLinuxOS 12, dove VirtuaBox è installato di default, su Debian 12 bisogna seguire i passi seguenti.

Download GPG Keys
$ wget -O- -q https://www.virtualbox.org/download/oracle_vbox_2016.asc | sudo gpg --dearmour -o /usr/share/keyrings/oracle_vbox_2016.gpg
Aggiungere repo
$ echo "deb [arch=amd64 signed-by=/usr/share/keyrings/oracle_vbox_2016.gpg] http://download.virtualbox.org/virtualbox/debian bookworm contrib" | sudo tee /etc/apt/sources.list.d/virtualbox.list
Installazione
$ sudo apt update
$ sudo apt install virtualbox-7.0
Installazione VirtualBox Extension Pack

aggiungere questa estensione è fondamentale poichè integra diverse funzionalità, come il supporto USB 2/3, vrdp, encryption ed altro ancora

Verificare correttamente la verione VirtualBox

$ vboxmanage -v | cut -dr -f1

output:

edmond@debian:~$ vboxmanage -v | cut -dr -f1
7.0.12
Download
$ wget https://download.virtualbox.org/virtualbox/7.0.12/Oracle_VM_VirtualBox_Extension_Pack-7.0.12.vbox-extpack
Installazione
$ sudo vboxmanage extpack install Oracle_VM_VirtualBox_Extension_Pack-7.0.12.vbox-extpack

verifica

$ vboxmanage list extpacks

output:

edmond@debian:~$ vboxmanage list extpacks
Extension Packs: 1
Pack no. 0: Oracle VM VirtualBox Extension Pack
Version: 7.0.12
Revision: 159484
Edition:
Description: Oracle Cloud Infrastructure integration, Host Webcam, VirtualBox RDP, PXE ROM, Disk Encryption, NVMe, full VM encryption.
VRDE Module: VBoxVRDP
Crypto Module: VBoxPuelCrypto
Usable: true
Why unusable:
Creazione utente
$ sudo usermod -a -G vboxusers $USER


VirtualBox 7 su Debian 12


enjoy 😉

Ansible su Debian 12 e SysLinuxOS

Ansible su Debian 12 e SysLinuxOS

Ansible su Debian 12 e SysLinuxOS


Guida su come installare Ansible su Debian 12 e SysLnuxOS 12. Ansible è un tool di automazione open source che viene utilizzato per automatizzare le attività IT, come la gestione della configurazione, il provisioning, il deployment e l’orchestrazione.

**Alcuni esempi di utilizzo di Ansible**

* Gestione della configurazione di server e macchine virtuali
* Deployment di applicazioni e software
* Orchestrazione di processi IT
* Provisionig di infrastrutture cloud

Installazione

Si può installare tramite apt:

$ sudo apt update
$ sudo apt install ansible -y

oppure tramite pip:

$ sudo apt install python3 python3-pip -y
$ pip install ansible --break-system-packages

in questo ultimo caso il PATH sarà in .local/bin/ansible, quindi:

$ export PATH=$PATH:/home/$USER/.local/bin

per rendere definitiva la modifica inserire il comando in .bashrc. Nel caso non fosse presente:

$ nano ~/.bashrc

ed inserire:

PATH=$PATH:~/bin
export PATH=$PATH:/home/$USER/.local/bin

quindi testare:

$ ansible --version

ansible [core 2.15.5]
config file = None
configured module search path = ['/home/edmond/.ansible/plugins/modules', '/usr/share/ansible/plugins/modules']
ansible python module location = /home/edmond/.local/lib/python3.11/site-packages/ansible
ansible collection location = /home/edmond/.ansible/collections:/usr/share/ansible/collections
executable location = /home/edmond/.local/bin/ansible
python version = 3.11.2 (main, Mar 13 2023, 12:18:29) [GCC 12.2.0] (/usr/bin/python3)
jinja version = 3.1.2
libyaml = True

Ansible deve essere installato su uno dei nodi. Il nodo di gestione è noto come Control Node. Questo nodo avrà il file Ansible Playbook. Questo è un file YAML che contiene i passaggi che l’utente desidera eseguire su una o più macchine normalmente denominate managed nodes.

Prerequisiti

Per questa guida ho usato 3 server:

Esempio ip_address
Control Node (SysLinuxOS 12) 192.168.1.168
Managed Node 1 (server 1 Debian 12) 192.168.1.200
Managed Node 2 (server 2 Raspberry Py OS 12) 192.168.1.251
Creazione Hosts Inventory file

questo file si occuperà del collegamento con i managed node:

$ mkdir ~/project
$ nano  ~/project/hosts

ed inserire ip ed username dei nodi da automatizzare:

[servers]
server1 ansible_host=192.168.1.200 ansible_user=edmond ansible_ssh_port=22
server2 ansible_host=192.168.1.251 ansible_user=edmond ansible_ssh_port=22

dopo se non si ha l’accesso ssh, si va a creare una chiave, che verrà copiata sui 2 server:

Creazione e copia chiave ssh
$ sudo su
# ssh-keygen
# ssh-copy-id root@192.168.1.200
# ssh-copy-id root@192.168.1.25
Utilizzo moduli Ansible

Sintassi:

$ ansible -i <host_file> -m <module> <host>

Dove:

  • -i ~/hosts: contiene la lista degli hosts
  • -m: specifica il modulo come ping,  shell ecc.ecc.
  • <host>: Ansible hosts dove lanciare i moduli

Utilizzare ping usando ansible ping module:

$ ansible -i ~/project/hosts -m ping all

output ping:

edmond@edmondbox:~$ ansible -i ~/project/hosts -m ping all
server2 | SUCCESS => {
"ansible_facts": {
"discovered_interpreter_python": "/usr/bin/python3"
},
"changed": false,
"ping": "pong"
}
server1 | SUCCESS => {
"ansible_facts": {
"discovered_interpreter_python": "/usr/bin/python3"
},
"changed": false,
"ping": "pong"
}

Utilizzo shell usando ansible shell module:

$ ansible -i ~/project/hosts -m shell -a "uptime" all

output uptime:

$ ansible -i ~/project/hosts -m shell -a "uptime" all

server2 | CHANGED | rc=0 >>
19:51:43 up 1 day, 3:00, 1 user, load average: 0.35, 0.11, 0.08
server1 | CHANGED | rc=0 >>
19:51:44 up 3:36, 1 user, load average: 0.00, 0.00, 0.00

output df:

$ ansible -i ~/project/hosts -m shell -a "df -h" all

server1 | CHANGED | rc=0 >>
Filesystem Size Used Avail Use% Mounted on
udev 661M 0 661M 0% /dev
tmpfs 185M 1.8M 184M 1% /run
/dev/mmcblk0p2 117G 8.0G 103G 8% /
tmpfs 925M 0 925M 0% /dev/shm
tmpfs 5.0M 16K 5.0M 1% /run/lock
/dev/mmcblk0p1 510M 61M 450M 12% /boot/firmware
tmpfs 185M 0 185M 0% /run/user/1000
server2 | CHANGED | rc=0 >>
Filesystem Size Used Avail Use% Mounted on
udev 1.6G 0 1.6G 0% /dev
tmpfs 380M 1.2M 379M 1% /run
/dev/mmcblk0p2 59G 11G 45G 19% /
tmpfs 1.9G 0 1.9G 0% /dev/shm
tmpfs 5.0M 16K 5.0M 1% /run/lock
/dev/mmcblk0p1 510M 61M 450M 12% /boot/firmware
tmpfs 380M 0 380M 0% /run/user/1000

output free:

$ ansible -i ~/project/hosts -m shell -a "free -m" all

server1 | CHANGED | rc=0 >>
total used free shared buff/cache available
Mem: 1848 732 126 13 1005 1115
Swap: 99 0 99
server2 | CHANGED | rc=0 >>
total used free shared buff/cache available
Mem: 3793 577 1916 45 1378 3215
Swap: 99 0 99Utilizzo modulo apt
Utilizzo modulo apt

Con il modulo apt, si possono utilizzare i classici comandi di apt update, apt upgrade, apt install ecc ecc. In questo caso useremo playbook.yaml.

1) apt update, apt upgrade, e in caso di nuovo kernel, reboot

$ nano ~/project/upgrade.yml

inserire:

---
- hosts: servers
become: yes
become_user: root
tasks:
- name: Update apt repo and cache on all Debian boxes
apt: update_cache=yes force_apt_get=yes cache_valid_time=3600

- name: Upgrade all packages on servers
apt: upgrade=dist force_apt_get=yes

- name: Check if a reboot is needed on all servers
register: reboot_required_file
stat: path=/var/run/reboot-required get_md5=no

- name: Reboot the box if kernel updated
reboot:
msg: "Reboot initiated by Ansible for kernel updates"
connect_timeout: 5
reboot_timeout: 300
pre_reboot_delay: 0
post_reboot_delay: 30
test_command: uptime
when: reboot_required_file.stat.exists

comando apt upgrade:

$ ansible-playbook project/upgrade.yml -i project/hosts

output:

BECOME password:

PLAY [servers] *****************************************************************

TASK [Gathering Facts] *********************************************************
ok: [server2]
ok: [server1]

TASK [Update apt repo and cache on all Debian boxes] ***************************
changed: [server2]
changed: [server1]

TASK [Upgrade all packages on servers] *****************************************
ok: [server2]
ok: [server1]

TASK [Check if a reboot is needed on all servers] ******************************
ok: [server2]
ok: [server1]

TASK [Reboot the box if kernel updated] ****************************************
skipping: [server1]
skipping: [server2]

PLAY RECAP *********************************************************************
server1 : ok=4 changed=1 unreachable=0 failed=0 skipped=1 rescued=0 ignored=0 
server2 : ok=4 changed=1 unreachable=0 failed=0 skipped=1 rescued=0 ignored=0

2) Installazione singolo pacchetto bc

$ nano ~/project/package.yml

inserire:

- hosts: all
become: yes
tasks:
- name : Install the latest bc package
apt: name=bc state=latest update_cache=true

comando con opzione -K per eseguire il comando da root:

$ ansible-playbook project/package.yml -i project/hosts -K

output:

PLAY [all] *********************************************************************

TASK [Gathering Facts] *********************************************************
ok: [server2]
ok: [server1]

TASK [Install the latest bc package] *******************************************
changed: [server2]
changed: [server1]

PLAY RECAP *********************************************************************
server1 : ok=2 changed=1 unreachable=0 failed=0 skipped=0 rescued=0 ignored=0 
server2 : ok=2 changed=1 unreachable=0 failed=0 skipped=0 rescued=0 ignored=0

3) Installazione pacchetto 7zip con output debug managed nodes

$ nano ~/project/output.yml

inserire:

- hosts: all
become: yes
tasks:
- name: Capture the Output
apt: name=7zip state=present update_cache=true
register: apt_output
- debug: var=apt_output

comando:

$ ansible-playbook project/output.yml -i project/hosts -K

output:

 "(Reading database ... 65%",
"(Reading database ... 70%",
"(Reading database ... 75%",
"(Reading database ... 80%",
"(Reading database ... 85%",
"(Reading database ... 90%",
"(Reading database ... 95%",
"(Reading database ... 100%",
"(Reading database ... 76140 files and directories currently installed.)",
"Preparing to unpack .../7zip_22.01+dfsg-8_arm64.deb ...",
"Unpacking 7zip (22.01+dfsg-8) ...",
"Setting up 7zip (22.01+dfsg-8) ...",
"Processing triggers for man-db (2.11.2-2) ..."

4) Installazione multipla e verifica pacchetti installati

$ nano ~/project/packages.yml

inserire:

---
- hosts: all
become: yes
tasks:
- name: Update apt cache and make sure Wget, Curl and Terminator are installed
apt:
name: "{{ item }}"
update_cache: yes
loop:
- wget
- curl
- terminator

comando:

$ ansible-playbook project/packeges.yml -i project/hosts -K

output:

PLAY [all] *********************************************************************

TASK [Gathering Facts] *********************************************************
ok: [server2]
ok: [server1]

TASK [Update apt cache and make sure Wget, Curl and Terminator are installed] ***
ok: [server2] => (item=wget)
ok: [server1] => (item=wget)
ok: [server2] => (item=curl)
ok: [server1] => (item=curl)
changed: [server2] => (item=terminator)
changed: [server1] => (item=terminator)

PLAY RECAP *********************************************************************
server1 : ok=2 changed=1 unreachable=0 failed=0 skipped=0 rescued=0 ignored=0 
server2 : ok=2 changed=1 unreachable=0 failed=0 skipped=0 rescued=0 ignored=0

come si può notare i pacchetti wget e curl sono presenti su entrambi i server, mentre terminator viene invece installato.


Ansible su Debian 12 e SysLinuxOS

enjoy 😉