Server DHCP su Debian 10 Buster

Server DHCP su Debian 10 Buster

Server DHCP su Debian 10 Buster. Installazione e configurazione di un server dhcp su Debian Buster:

# apt install isc-dhcp-server

settare la scheda di rete da utilzzare, nel mio caso eth0:

# nano /etc/default/isc-dhcp-server
# Defaults for isc-dhcp-server initscript
# sourced by /etc/init.d/isc-dhcp-server
# installed at /etc/default/isc-dhcp-server by the maintainer scripts

#
# This is a POSIX shell fragment
#

# Path to dhcpd's config file (default: /etc/dhcp/dhcpd.conf).
#DHCPD_CONF=/etc/dhcp/dhcpd.conf

# Path to dhcpd's PID file (default: /var/run/dhcpd.pid).
#DHCPD_PID=/var/run/dhcpd.pid

# Additional options to start dhcpd with.
#       Don't use options -cf or -pf here; use DHCPD_CONF/ DHCPD_PID instead
#OPTIONS=""

# On what interfaces should the DHCP server (dhcpd) serve DHCP requests?
#       Separate multiple interfaces with spaces, e.g. "eth0 eth1".
INTERFACES="eth0"

poi modificare il file dhcpd.conf inserendo i parametri della nostra rete, nel mio caso 192.168.100.0/24:

# nano /etc/dhcp/dhcpd.conf
# Sample configuration file for ISC dhcpd for Debian
#
#

# The ddns-updates-style parameter controls whether or not the server will
# attempt to do a DNS update when a lease is confirmed. We default to the
# behavior of the version 2 packages ('none', since DHCP v2 didn't
# have support for DDNS.)
ddns-update-style none;

# option definitions common to all supported networks...
option domain-name "example.org";
option domain-name-servers ns1.example.org, ns2.example.org;
default-lease-time 600;
max-lease-time 7200;

# If this DHCP server is the official DHCP server for the local
# network, the authoritative directive should be uncommented.
#authoritative;

# Use this to send dhcp log messages to a different log file (you also
# have to hack syslog.conf to complete the redirection).
log-facility local7;

# No service will be given on this subnet, but declaring it helps the
# DHCP server to understand the network topology.

#subnet 10.152.187.0 netmask 255.255.255.0 {
#}

# This is a very basic subnet declaration.
subnet 192.168.100.0 netmask 255.255.255.0 {
range 192.168.100.150 192.168.100.160;
option routers 192.168.100.1;
option subnet-mask 255.255.255.0;
option broadcast-address 192.168.100.254;
option domain-name-servers 192.168.100.1, 192.168.100.2;
option ntp-servers 192.168.100.1;
option netbios-name-servers 192.168.100.1;
option netbios-node-type 8;
}
#subnet 10.254.239.0 netmask 255.255.255.224 {
#  range 10.254.239.10 10.254.239.20;
#  option routers rtr-239-0-1.example.org, rtr-239-0-2.example.org;
#}

# This declaration allows BOOTP clients to get dynamic addresses,
# which we don't really recommend.

#subnet 10.254.239.32 netmask 255.255.255.224 {
#  range dynamic-bootp 10.254.239.40 10.254.239.60;
#  option broadcast-address 10.254.239.31;
#  option routers rtr-239-32-1.example.org;
#}

# A slightly different configuration for an internal subnet.
#subnet 10.5.5.0 netmask 255.255.255.224 {
#  range 10.5.5.26 10.5.5.30;
#  option domain-name-servers ns1.internal.example.org;
#  option domain-name "internal.example.org";
#  option routers 10.5.5.1;
#  option broadcast-address 10.5.5.31;
#  default-lease-time 600;
#  max-lease-time 7200;
#}

# Hosts which require special configuration options can be listed in
# host statements.   If no address is specified, the address will be
# allocated dynamically (if possible), but the host-specific information
# will still come from the host declaration.

#host passacaglia {
#  hardware ethernet 0:0:c0:5d:bd:95;
#  filename "vmunix.passacaglia";
#  server-name "toccata.fugue.com";
#}

# Fixed IP addresses can also be specified for hosts.   These addresses
# should not also be listed as being available for dynamic assignment.
# Hosts for which fixed IP addresses have been specified can boot using
# BOOTP or DHCP.   Hosts for which no fixed address is specified can only
# be booted with DHCP, unless there is an address range on the subnet
# to which a BOOTP client is connected which has the dynamic-bootp flag
# set.
#host fantasia {
#  hardware ethernet 08:00:07:26:c0:a5;
#  fixed-address fantasia.fugue.com;
#}

# You can declare a class of clients and then do address allocation
# based on that.   The example below shows a case where all clients
# in a certain class get addresses on the 10.17.224/24 subnet, and all
# other clients get addresses on the 10.0.29/24 subnet.

#class "foo" {
#  match if substring (option vendor-class-identifier, 0, 4) = "SUNW";
#}

#shared-network 224-29 {
#  subnet 10.17.224.0 netmask 255.255.255.0 {
#    option routers rtr-224.example.org;
#  }
#  subnet 10.0.29.0 netmask 255.255.255.0 {
#    option routers rtr-29.example.org;
#  }
#  pool {
#    allow members of "foo";
#    range 10.17.224.10 10.17.224.250;
#  }
#  pool {
#    deny members of "foo";
#    range 10.0.29.10 10.0.29.230;
#  }
#}

dopo le modifiche riavviare il servizio:

# systemctl restart isc-dhcp-server.service
Server DHCP su Debian Buster

enjoy ?

Installare VirtualBox 6.0 su Debian 9

Installare VirtualBox 6.0 su Debian 9Guida su come installare Oracle Virtualbox 6.0 su Debian 9 Stretch e Debian 10 Testing/Buster, testata e funzionante.

Aggiornare il sistema:
$ sudo apt update
$ sudo apt upgrade -y
Importare le chiavi ed aggiungere i repository:
$ wget -q https://www.virtualbox.org/download/oracle_vbox_2016.asc -O- | sudo apt-key add -
$ wget -q https://www.virtualbox.org/download/oracle_vbox.asc -O- | sudo apt-key add -
$ echo "deb [arch=amd64] http://download.virtualbox.org/virtualbox/debian $(lsb_release -sc) contrib" | sudo tee /etc/apt/sources.list.d/virtualbox.list
Installare VirtualBox e VirtualBox Exstension Pack:
$ sudo apt update
$ sudo apt install linux-headers-$(uname -r) dkms
$ sudo apt-get install virtualbox-6.0
$ wget https://download.virtualbox.org/virtualbox/6.0.0/Oracle_VM_VirtualBox_Extension_Pack-6.0.0.vbox-extpack

per installare VirtualBox Exstension Pack basta un doppio click sul file scaricato precedentemente.

enjoy 😉

Creare una usb bootable Windows 10 da Gui Debian

Creare una usb bootable Windows 10 da Gui DebianCreare una usb bootable Windows 10 da Gui Debian

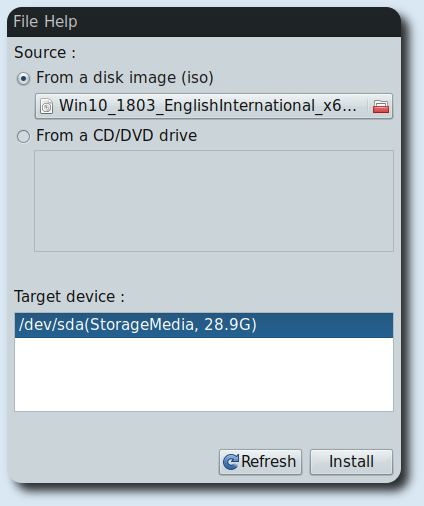
Guida su come creare una usb bootable con Windows 10 direttamente da Debian 9/10 utilizzando WoeUSB come Gui. Precedentemente avevo già fatto una guida, per lo stesso scopo, ma utilizzando solamente il terminale. Questo metodo è molto più semplice e veloce:

sudo apt install devscripts equivs git python3-pip
git clone https://github.com/slacka/WoeUSB.git
cd WoeUSB/
./setup-development-environment.bash
mk-build-deps
sudo dpkg -i woeusb-build-deps_*
dpkg-buildpackage -uc -b
sudo dpkg -i ../woeusb*.deb

in caso di problemi con le dipendenze digitare:

sudo apt install -f

enjoy 😉

Installare Oracle Java 10 su Debian 9-10 via APT

Installare Oracle Java 10 su Debian 9/10 via APTInstallare Oracle Java 10 su Debian 9-10 via APT

Ci sono diversi modi per installare Oracle Java su Debian, ma quello più comodo è aggiungere i repository di Linux Uprising:

ed usare apt:

sudo apt update
sudo apt upgrade -y
sudo apt install software-properties-common
sudo add-apt-repository ppa:linuxuprising/java
sudo apt update
sudo apt-key adv --keyserver keyserver.ubuntu.com --recv-keys EA8CACC073C3DB2A
sudo apt update
sudo apt install -y oracle-java10-installer
sudo update-alternatives --config java
sudo update-alternatives --config javac
sudo update-alternatives --config javaws

output:

edmond@debianbox:~$ sudo update-alternatives --config java
There are 3 choices for the alternative java (providing /usr/bin/java).

Selection Path Priority Status
------------------------------------------------------------
0 /usr/local/oracle-java-8/jdk1.8.0_191/bin/java 1500 auto mode
* 1 /usr/lib/jvm/java-10-oracle/bin/java 1091 manual mode
2 /usr/lib/jvm/java-8-openjdk-amd64/jre/bin/java 1081 manual mode
3 /usr/local/oracle-java-8/jdk1.8.0_191/bin/java 1500 manual mode

Press <enter> to keep the current choice[*], or type selection number:

Installare Oracle Java 10 su Debian 9-10 via APT

enjoy 😉

Analizzare routers e devices IoT con RouterSploit

Analizzare routers e devices IoT con RouterSploitAnalizzare routers e devices IoT con RouterSploit

RouterSploit è uno script in python che serve ad analizzare devices IoT e routers per scoprire eventualmente exploit noti, e quindi mettere il tutto in sicurezza. Può essere anche usato per analizzare dispositivi embedded, stampanti, telecamere. Per installarlo su Debian Stretch/Buster basta seguire questi semplici passi:

sudo apt install python3-pip git
git clone https://www.github.com/threat9/routersploit
cd routersploit/
sudo pip3 install -r requirements.txt

Avviare RouterSploit:

cd routersploit/
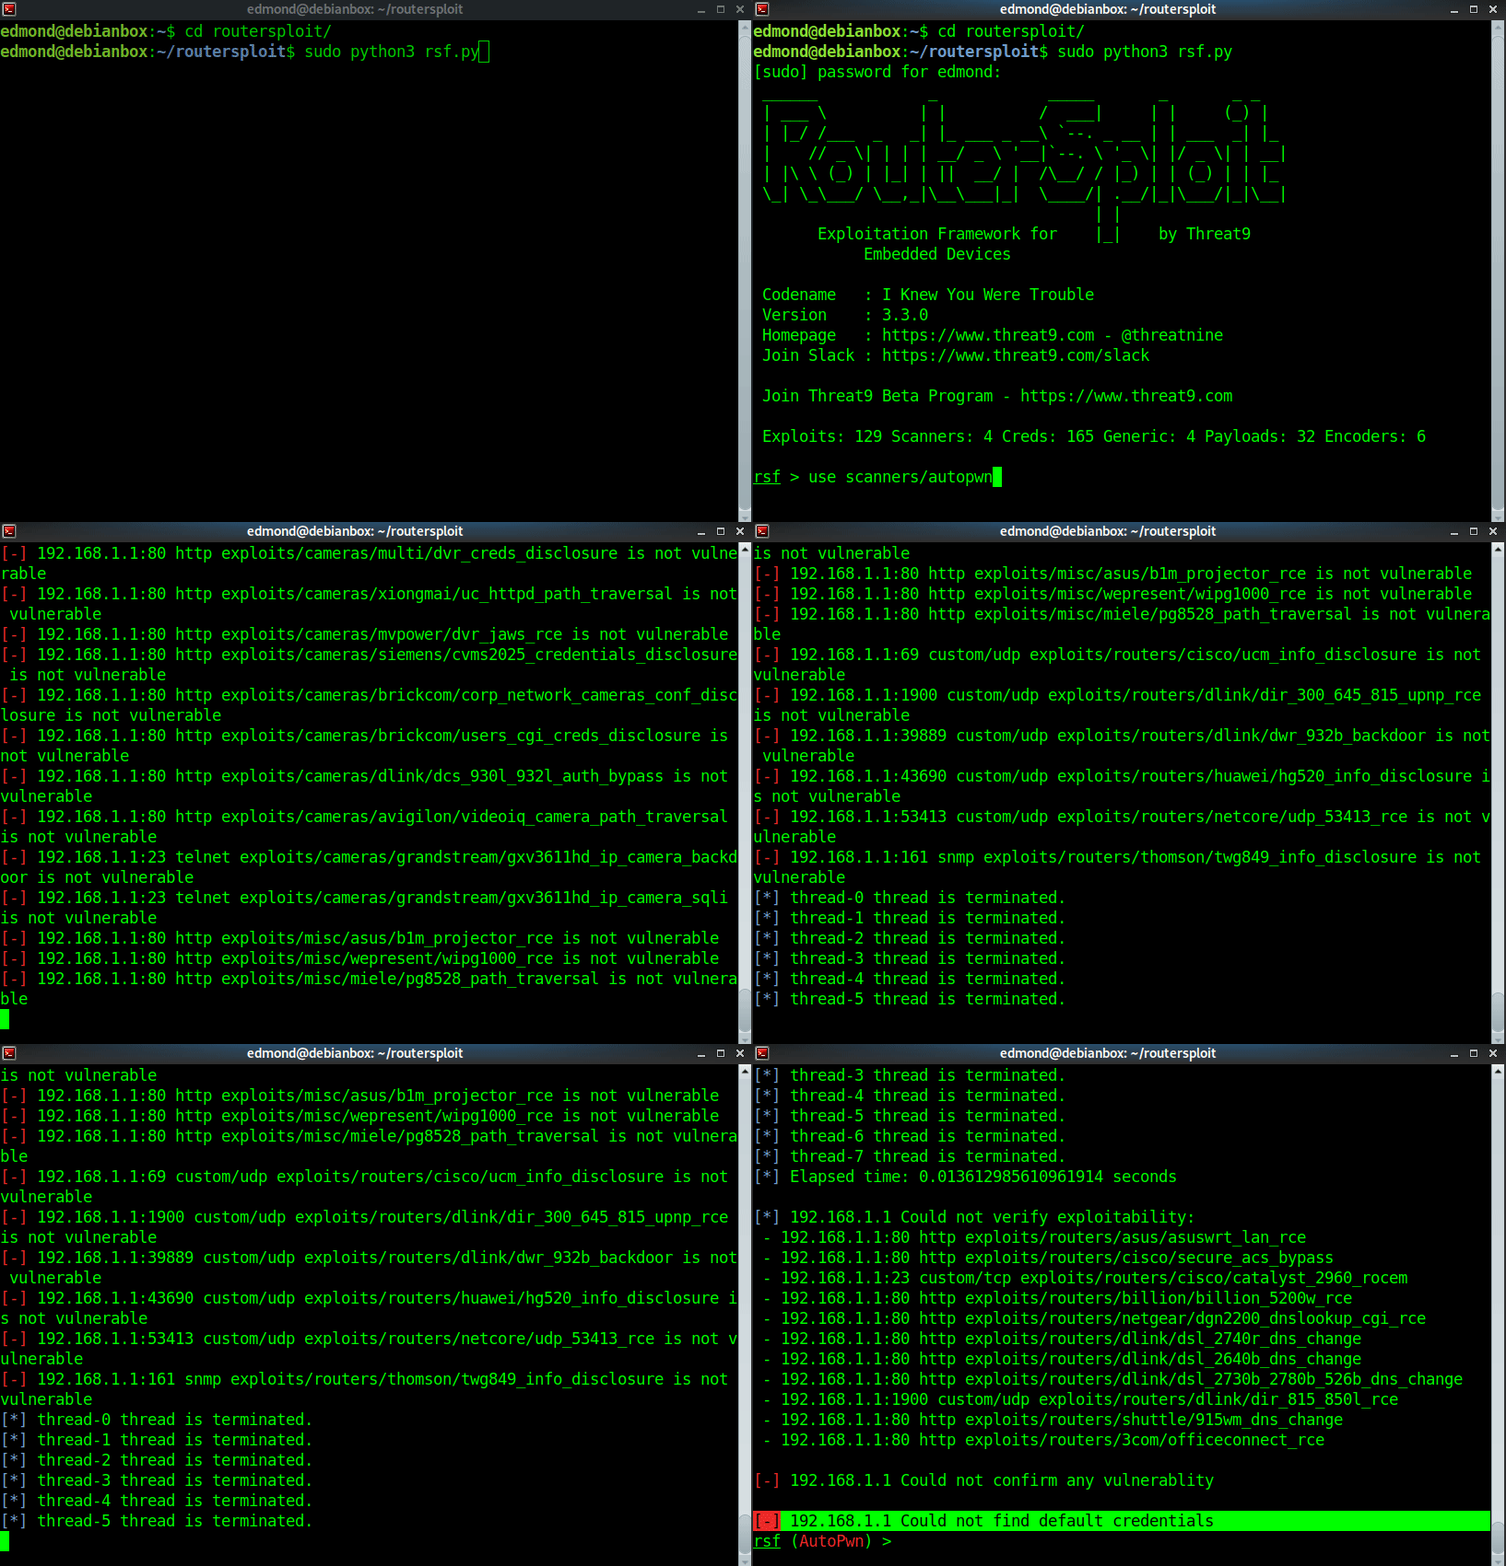
sudo python3 rsf.py
use scanners/autopwn
set target 192.168.1.1

i comandi sopra avvieranno RouterSploit che analizzerà l’ip del router, successivamente cambiare target per gli altri devices.

Analizzare routers e devices IoT con RouterSploit

enjoy 😉

(Solved) warning ldconfig not found in PATH Debian Buster

Passando da Debian Stretch a Debian Buster modificando i sources-list, alla fine dell’upgrade molto probabilmente non si potrà più installare un nuovo pacchetto poichè si presenterà l’errore seguente:

Preconfiguring packages …
dpkg: warning: 'ldconfig' not found in PATH or not executable.
dpkg: warning: 'start-stop-daemon' not found in PATH or not executable.
dpkg: error: 2 expected programs not found in PATH or not executable.
Note: root's PATH should usually contain /usr/local/sbin, /usr/sbin and /sbin.
E: Sub-process /usr/bin/dpkg returned an error code (2)

questo errore si risolve con:

su
nano /root/.bashrc

aggiungere in fondo:

export PATH=/usr/local/sbin:/usr/local/bin:/usr/sbin:/usr/bin:/sbin:/bin

riavviare:

reboot

enjoy 😉

Systemback 1.9.3 per Debian 9 Ubuntu 17-10 18-04

Systemback 1.9.3 per Debian 9 Ubuntu 17-10 18-04

update 26/01/2019

Systemback 1.9.3 per Debian 9 Ubuntu 17-10 18-04

Nuovo aggiornamento per Systemback che arriva alla versione 1.9.3, aggiungendo i pacchetti e la compatibilità con Ubuntu 17-10 ed Ubuntu 18-04. In questa versione, oltre a qualche vezzo, ed alcuni bug fix, ho aggiunto anche il supporto per SSD NVMe, anche se al momento funziona meglio se si ha già una partizione pronta all’uso. Tenendo conto che è un lavoro che faccio a tempo perso ogni feed e commento saranno bene accetti.

DOWNLOAD SYSTEMBACK-1.9.3

DOWNLOAD SOURCE

poi:

$ cd Downloads/
$ tar xvf systemback-install_pack-1.9.3.tar.xz
$ cd systemback-install_pack-1.9.3/
$ sudo apt-get install unionfs-fuse live-boot
$ sudo apt-get install grub2-common grub-efi-amd64-bin grub-pc-bin
$ sudo ./install.sh
$ sudo apt-get install -f 

DEBIAN 32 BIT

cercando di installare Systemback-1.9.3 su Debian Stretch 32 bit e non solo, si verifica l’errore di versione per i pacchetti: libqt5core5a (>= 5.10.0) e libqt5gui5. Si risolve aggiornando i pacchetti dai repo testing:

# nano /etc/apt/sources.list

ed aggiungere:

deb http://ftp.it.debian.org/debian/ testing main non-free contrib

poi affinchè non si aggiorni tutto il sistema, andiamo a creare un file , dove diremo che, la priorità dei pacchetti è solo quella della versione della distro installata, e cioè in questo caso stable/stretch:

# nano /etc/apt/apt.conf.d/99defaultrelease

ed incollare dentro:

APT::Default-Release "stable";

a questo punto siamo pronti ad installare la versione dei pacchetti aggiornati:

# apt update
# apt install -t testing libqt5core5a libqt5gui5

poi si potrà proseguire con l’installazione di systemback-1.9.3

Systemback 1.9.3 per Debian 9 Ubuntu 17-10 18-04

enjoy 😉


Teamviewer 13 su Debian Stretch e Buster


Teamviewer 13 su Debian Stretch e Buster

Teamviewer 13 su Debian Stretch e Buster

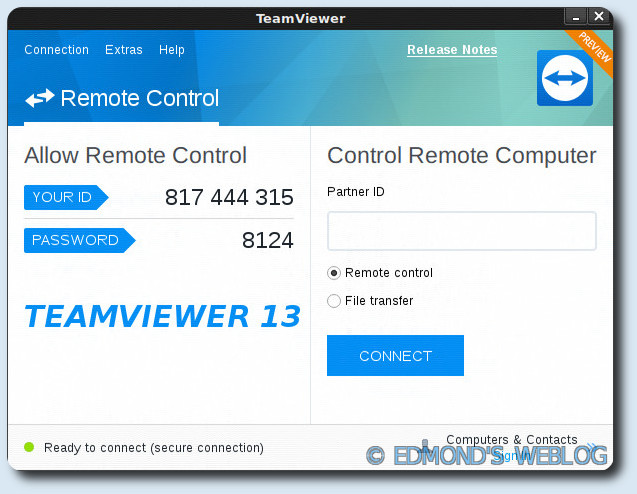
Per installare Teamviewer 13 su Debian 9 Stretch e Debian 10 Buster, eseguire  i seguenti comandi:

# su
# apt update; apt upgrade -y
# cd /tmp
# wget -c https://download.teamviewer.com/download/linux/teamviewer_amd64.deb
# apt install ./teamviewer*.deb

Teamviewer 13 su Debian Stretch e Buster

enjoy 😉


(Solved) Problema di boot bug ifupdown su Debian Buster

(Solved) Problema di boot bug ifupdown su Debian Buster

(Solved) Problema di boot bug ifupdown su Debian Buster

Dopo gli ultimi aggiornamenti su Debian Buster, il sistema si blocca per 2/3 minuti con l'errore "a start job is running for wait for network to be configured by ifupdown". Non ho indagato molto su questo tipo di bug, ma dato che è molto fastidioso, si può risolvere al momento disabilitando ifupdown.

# nano /etc/default/networking

e cambiare da così:

WAIT_ONLINE_METHOD=ifupdown

a così:

WAIT_ONLINE_METHOD=none

a start job is running for wait for network to be configured by ifupdown

enjoy 😉


Oracle Virtualbox 5.1 su Debian Stretch-Buster


Oracle Virtualbox 5.1 su Debian Stretch-Buster

Guida su come installare Oracle Virtualbox 5.1 su Debian Stretch e Debian Testing/Buster, testata e funzionante. I comandi sotto sono tutti eseguiti da root:

# apt update; apt upgrade -y
# echo "deb https://download.virtualbox.org/virtualbox/debian stretch contrib" > /etc/apt/sources.list.d/virtualbox-debian.list
# wget -q https://www.virtualbox.org/download/oracle_vbox_2016.asc -O- | apt-key add -
# apt update; apt install virtualbox-5.1 dkms -y

Oracle Virtualbox 5.1 su Debian Stretch-Buster

enjoy 😉