Creare una Debian Jessie Live persistente con firmware non-free


Creare una Debian Jessie Live persistente con firmware non-free


Guida su come creare una Debian Jessie Live persistente con firmware non-free, alla Debian way. Possedere una chiavetta usb con la propria distribuzione preferita può ritornare utile, sia come OS di riserva, live o installabile, sia come strumento di lavoro. Per avere un buon strumento di lavoro, bisogna però avere tutti i propri programmi preferiti, e per ottenere ciò bisogna creare una Debian Live in modalità persistente. Con la modalità persistente, si può installare tutto quello che serve e portarsi dietro i documenti preferiti,  ed addirittura la distribuzione può essere aggiornata, senza paura che al riavvio le modifiche vadano perse. Quello che serve come prima cosa è scaricare la Debian Live iso-hybrid, scegliendo anche il proprio Desktop Environment, ed alcuni pacchetti:


# apt-get install mbr syslinux p7zip


la mia chiavetta di 8G viene identificata come /dev/sdb, quindi la guida utilizzerà questa sintassi:

Inserire la chiavetta usb e verificare come viene identificata, la mia come /dev/sdb con 2 partizioni:

# fdisk -l
# umount /dev/sdb1
# umount /dev/sdb2


Formattazione:

# dd count=1 bs=512 if=/dev/zero of=/dev/sdb


Creazione tabella delle partizioni e di 2 partizioni, una in fat32 l'altra in ext4:

# parted /dev/sdb
(parted) mklabel msdos                                          
(parted) mkpart primary fat32 1 1536M                                  
(parted) mkpart primary ext4 1536 8G
(parted) set 1 boot on                                                   
(parted) q


Creazione filesystem:

# /sbin/mkdosfs -n live /dev/sdb1
# /sbin/mkfs.ext4 -L persistence /dev/sdb2
# mkdir /mnt/live
# mkdir /mnt/persistence
# mount /dev/sdb1 /mnt/live
# mount /dev/sdb2 /mnt/persistence
# cd /mnt/live
# 7z x /percorso_iso_scariicata/debian-live-8.2.0-amd64-mate-desktop+nonfree.iso


Modificare il file live.cfg inserendo le opzioni persistence e noeject:

# nano isolinux/live.cfg

dove la prima parte deve essere come sotto:

label live-amd64
        menu label ^Live (amd64)
        menu default
        linux /live/vmlinuz
        initrd /live/initrd.img
        append boot=live components persistence noeject quiet splash


Creazione del dispositivo usb bootable e della seconda partizione persistente:

# /sbin/install-mbr /dev/sdb
# syslinux -i /dev/sdb1
# mv isolinux syslinux
# mv syslinux/isolinux.cfg syslinux/syslinux.cfg
# mv syslinux/isolinux.bin syslinux/syslinux.bin
# cd /mnt/persistence
# echo / union > persistence.conf
# cd ..
# umount /mnt/live
# umount /mnt/persistence

A questo punto si può riavviare e provare la Debian Jessie Live persistente con firmware non-free. La prima cosa da fare volendo è quella di aggiornare il sistema per poi installare i propri programmi preferiti:

# apt-get update && apt-get upgrade -y

Utente e password di default sono: username=user password=live


enjoy 😉


Avviare Tightvncserver al boot su Raspberry pi 2 e Debian Jessie


Avviare Tightvncserver al boot su Raspberry pi 2 e Debian Jessie


Per avviare Tightvncserver al boot su Raspberry pi 2 e Debian Jessie, ma anche su altri sistemi Linux, i passi da seguire sono i seguenti:

$ sudo nano /etc/init.d/tightvncserver

ed incollare dentro quanto sotto, inserendo il proprio nome utente:

#!/bin/bash
# /etc/init.d/tightvncserver
# Inserire il nome utente di chi avvierà tightvncserver
VNCUSER='UTENTE'
case "$1" in
  start)
    su $VNCUSER -c '/usr/bin/tightvncserver :1'
    echo "Starting TightVNC server for $VNCUSER"
    ;;
  stop)
    pkill Xtightvnc
    echo "Tightvncserver stopped"
    ;;
  *)
    echo "Usage: /etc/init.d/tightvncserver {start|stop}"
    exit 1
    ;;
esac
exit 0

salvare, settare i permessi e riavviare:

$ sudo chmod 755 /etc/init.d/tightvncserver
$ sudo update-rc.d tightvncserver defaults
$ sudo reboot


enjoy 😉


Installare Asterisk 13 con Freepbx 12 su Raspberry pi 2 e Debian Jessie


Installare Asterisk 13 con Freepbx 12 su Raspberry pi 2 e Debian Jessie


Guida su come Installare Asterisk 13 con Freepbx 12 su Raspberry pi 2 e Debian Jessie Armhf, e che funziona naturalmente anche su architettura AMD64 & Intel 64.

Aggiornare il sistema:

# apt-get update && apt-get upgrade

se viene installato un nuovo kernel riavviare.

Scaricare le dipendenze ed i servizi necessari:

# apt-get install -y build-essential openssh-server apache2 mysql-server mysql-client bison flex php5 php5-curl php5-cli php5-mysql php-pear php-db php5-gd curl sox libncurses5-dev libssl-dev libmysqlclient-dev mpg123 libxml2-dev libnewt-dev sqlite3 libsqlite3-dev pkg-config automake libtool autoconf git subversion unixodbc-dev uuid uuid-dev libasound2-dev libogg-dev libvorbis-dev libcurl4-openssl-dev libical-dev libneon27-dev libsrtp0-dev libspandsp-dev libiksemel-dev libiksemel-utils libiksemel3 libjansson-dev libapache2-mod-php5

a metà installazione verrà chiesto di settare una password per Mysql MEMORIZZARLA/SEGNARSELA. Scaricare l'occorrente: Pjproject, Jansson, Asterisk, Freepbx:

# cd /usr/src
# wget https://downloads.asterisk.org/pub/telephony/asterisk/asterisk-13-current.tar.gz
# wget -O jansson.tar.gz https://github.com/akheron/jansson/archive/v2.7.tar.gz
# wget https://www.pjsip.org/release/2.4.5/pjproject-2.4.5.tar.bz2
# wget https://mirror.freepbx.org/modules/packages/freepbx/freepbx-12.0-latest.tgz

Installare Pjproject:

# cd /usr/src
# tar -xjvf pjproject-2.4.5.tar.bz2
# cd pjproject-2.4.5
# CFLAGS='-DPJ_HAS_IPV6=1' ./configure --enable-shared --disable-sound --disable-resample --disable-video --disable-opencore-amr
# make dep
# make -j2
# make install

Installare Jansson:

# cd /usr/src
# tar vxfz jansson.tar.gz
# cd jansson-*
# autoreconf -i
# ./configure
# make -j2
# make install

 Installare Asterisk 13:

# cd /usr/src
# tar xvfz asterisk-13-current.tar.gz
# cd asterisk-13.*
# contrib/scripts/get_mp3_source.sh
# ./configure
# make menuselect

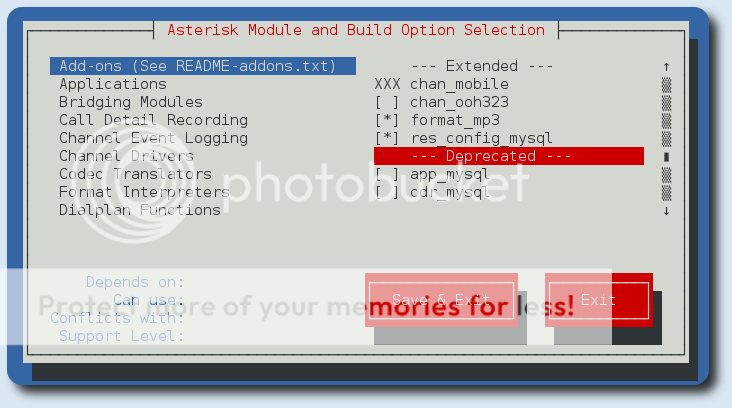
a questo punto conviene dare un occhiata ed abilitare qualche modulo in più, come format_mp3:

Installare Asterisk 13 con Freepbx 12 su Raspberry pi 2 e Debian Jessie


# make -j2
# make install
# make config
# ldconfig

Installazione e configurazione di Freepbx, Mysql ed Apache2, e quando richiesto inserire la password Mysql:

# cd /usr/src
# tar vxfz freepbx-12.0-latest.tgz
# cd freepbx
# pear uninstall db
# pear install db-1.7.14
# useradd -m asterisk
# chown asterisk. /var/run/asterisk
# chown -R asterisk. /etc/asterisk
# chown -R asterisk. /var/{lib,log,spool}/asterisk
# chown -R asterisk. /usr/lib/asterisk
# rm -rf /var/www/html
# cp /etc/apache2/apache2.conf /etc/apache2/apache2.conf_orig
# sed -i 's/\(^upload_max_filesize = \).*/\120M/' /etc/php5/apache2/php.ini
# sed -i 's/AllowOverride None/AllowOverride All/'  /etc/apache2/apache2.conf
# sed -i 's/^\(User\|Group\).*/\1 asterisk/' /etc/apache2/apache2.conf
# service apache2 restart
# mysqladmin -u root create asterisk -p
# mysqladmin -u root create asteriskcdrdb -p
# mysql -u root -p -e "GRANT ALL PRIVILEGES ON asterisk.* TO asteriskuser@localhost IDENTIFIED BY 'password';"
# mysql -u root -p -e "GRANT ALL PRIVILEGES ON asteriskcdrdb.* TO asteriskuser@localhost IDENTIFIED BY 'password';"
# mysql -u root -p -e "flush privileges;"
# ./start_asterisk start
# ./install_amp --installdb --username=asteriskuser --password=password

durante il processo di installazione verranno mostrate alcune voci, le uniche da corregere eventualmente sono l'indirizzo IP del  Raspberry e la password di accesso di amministrazione:

Enter a PASSWORD to connect to the Asterisk Manager interface:
 [amp111] PASSWORD
Enter the path to use for your AMP web root:
 [/var/www/html]

Created /var/www/html
Enter the IP ADDRESS or hostname used to access the AMP web-admin:
 [192.168.1.1] 192.168.1.16


# amportal restart
# amportal chown
# amportal a ma installall
# amportal a ma refreshsignatures
# amportal chown
# ln -s /var/lib/asterisk/moh /var/lib/asterisk/mohmp3
# amportal restart


se tutto è andato bene il server Asterisk è raggiungibile all'indirizzo https://ip_raspberry

UPDATE: Nel caso di pagina bianca eseguire i passi successivi:

# cd /usr/src/freepbx
# sed -i 's/^\(User\|Group\).*/\1 asterisk/' /etc/apache2/apache2.conf
# service apache2 restart

e poi accedere all'indirizzo https://ip_raspberry/admin

enjoy 😉


(Solved) Problemi con Kodi su Raspberry pi 2 e Debian Jessie


Dopo avere installato Debian Jessie pura su Raspberry pi 2, che io chiamo RaspJessie, ho avuto dei problemi con Kodi, tutti imputabili al fatto che creando un nuovo utente, questo non aveva i permessi di input, per la tastiera ed il mouse e quelli video. Lanciando Kodi il primo errore che si è presentato è stato: failed to open vchiq instance, che si risolve cambiando l'utente che lancerà kodi:

sudo nano /etc/default/kodi

e sostituire l' utente kodi. Poi verificare i gruppi per l'utente Kodi e il nuovo utente RaspJessie, aggiungendoli ai gruppi, video ed input:

$ id kodi
$ id utente_RaspJessie

quindi:

$ sudo usermod -a -G video utente_RaspJessie
$ sudo usermod -a -G input utente_RaspJessie
$ sudo usermod -a -G input kodi

e poi logout.


enjoy 😉


Server Cloud WebDav su Raspberry pi 2 e Debian Jessie

Server WebDav su Raspberry pi 2


Per avere un proprio Server Cloud WebDav su Raspberry pi 2 e Debian Jessie, da utilizzare sia in locale che da remoto, alla stregua di Dropbox, Box.com, OneDrive ecc ecc, i passi da seguire sono i seguenti:

sudo apt-get install apache2
sudo a2enmod dav_fs
sudo a2enmod auth_digest
sudo service apache2 restart
sudo mkdir -p /webdav
sudo chown www-data /webdav
sudo cp /etc/apache2/sites-available/000-default.conf /etc/apache2/sites-available/000-default.conf_bak
sudo nano /etc/apache2/sites-available/000-default.conf

che deve essere come sotto, inserendo al posto delle xxx.xxx.x.x, l' IP del Raspberry:

<VirtualHost xxx.xxx.x.x:80>
        ServerAdmin webmaster@localhost

        DocumentRoot /webdav
        <Directory /webdav>
                Options Indexes MultiViews
                AllowOverride None
                Order allow,deny
                allow from all
        </Directory>

        Alias /webdav /webdav

        <Location /webdav>
           DAV On
           AuthType Basic
           AuthName "webdav"
           AuthUserFile /webdav/passwd.dav
           Require valid-user
       </Location>
</VirtualHost>


sudo service apache2 restart
sudo htpasswd -c /webdav/passwd.dav nome_utente_Raspberry

per chi deve accedere da Windows al server WebDav:

sudo htpasswd /webdav/passwd.dav xxx.xxx.x.x\\nome_utente_Raspberry

poi:

sudo chown root:www-data /webdav/passwd.dav
sudo chmod 640 /webdav/passwd.dav
sudo service apache2 restart

Il server sarà raggiungibile all'indirizzo https://ip_server/webdav

Adesso un minimo di protezione per il nostro server cloud installando Fail2ban, così da bloccare dopo 3 tentativi l'IP di che tenta di accedere senza le giuste credenziali:

sudo apt-get install fail2ban
sudo nano /etc/fail2ban/jail.local

ed inserire:

[apache]
enabled  = true
port     = https,https
filter   = apache-auth
logpath  = /var/log/apache*/*error.log
maxretry = 6

[apache-noscript]
enabled  = true
port     = https,https
filter   = apache-noscript
logpath  = /var/log/apache*/*error.log
maxretry = 6

[apache-overflows]
enabled  = true
port     = https,https
filter   = apache-overflows
logpath  = /var/log/apache*/*error.log
maxretry = 2

[apache-nohome]
enabled  = true
port     = https,https
filter   = apache-nohome
logpath  = /var/log/apache*/*error.log
maxretry = 2

riavviare fail2ban:

sudo service fail2ban restart

adesso siamo pronti ad utilizzare il nostro server cloud.


enjoy 😉


Flash su Raspberry pi 2 con Chromium-Pepper


Per avere il plugin flash su Raspberry pi 2, bisogna installare chromium-browser e chromium-pepper, questo sia se si sta utilizzando Raspbian Jessie, sia Debian Jessie armhf. Per installare questi pacchetti bisogna andarli a prelevare nei repository di altre distro:

Scaricare ed installare Chromium:

$ wget https://www.dropbox.com/s/3iw9oopqolnw0ca/chromium-browser_45.0.2454.85-0ubuntu0.15.04.1.1181_armhf.deb
$ wget https://www.dropbox.com/s/dylujonf0mb6wul/chromium-browser-l10n_45.0.2454.85-0ubuntu0.15.04.1.1181_all.deb
$ wget https://www.dropbox.com/s/qxlw1mcx6orb9bi/chromium-codecs-ffmpeg-extra_45.0.2454.85-0ubuntu0.15.04.1.1181_armhf.deb
$ sudo dpkg -i chromium-browser_45.0.2454.85-0ubuntu0.15.04.1.1181_armhf.deb
$ sudo dpkg -i chromium-browser-l10n_45.0.2454.85-0ubuntu0.15.04.1.1181_all.deb
$ sudo dpkg -i chromium-codecs-ffmpeg-extra_45.0.2454.85-0ubuntu0.15.04.1.1181_armhf.deb
$ sudo apt-get install -f

Scaricare chromium-pepper

$ wget
$ tar -xf chromium-pepper-flash-12.0.0.77-1-armv7h.pkg.tar.xz
$ cd usr/lib/PepperFlash/
$ sudo cp * /usr/lib/chromium-browser/plugins

fare delle modifiche:

$ sudo nano  /etc/chromium-browser/default

ed aggiungere sotto CHROMIUM_FLAGS="

CHROMIUM_FLAGS="--ppapi-flash-path=/usr/lib/chromium-browser/plugins/libpepflashplayer.so --ppapi-flash-version=12.0.0.77-1 -password-store=detect -user-data-dir"

adesso si è pronti ad utilizzare il plugin flash su Raspberry pi 2.


enjoy 🙂


Debian Jessie su Raspberry pi 2

                       Debian Jessie su Raspberry pi 2


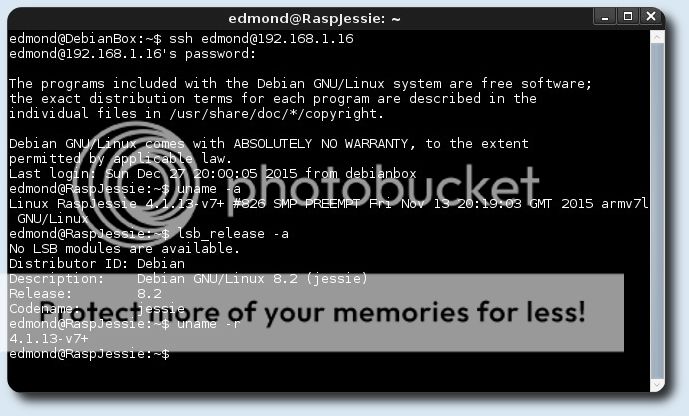
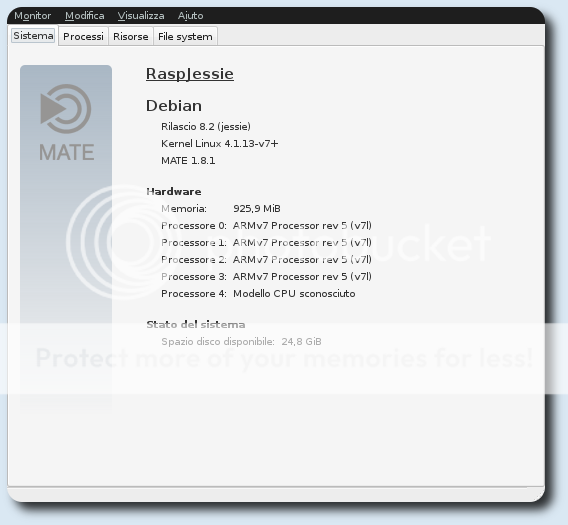
Come ottenere una Debian Jessie originale per  Raspberry pi 2, e sfruttare quindi i repository Debian. Pur avendo usato Raspbian, ho sempre voluto avere una Debian pura, e sopratutto voglio Mate come DE. Per ottenere una Debian pura su Raspberry pi 2, utilzzo Debootstrap e qemu-user-static su un pc con Debian Jessie x64.


$ targetdir=rootfs
$ distro=jessie
$ mkdir $targetdir
$ sudo apt-get install qemu-user-static debootstrap binfmt-support
$ sudo debootstrap --arch=armhf --foreign $distro $targetdir
$ sudo cp /usr/bin/qemu-arm-static $targetdir/usr/bin/
$ sudo cp /etc/resolv.conf $targetdir/etc
$ sudo chroot $targetdir
# distro=jessie
# export LANG=C
# /debootstrap/debootstrap --second-stage


Aggiungere i repository:

cat > /etc/apt/sources.list << EOF
deb https://ftp.it.debian.org/debian jessie main contrib non-free
deb https://ftp.it.debian.org/debian jessie-updates main contrib non-free
deb https://security.debian.org jessie/updates main contrib non-free
deb https://archive.raspberrypi.org/debian jessie main
EOF


un po di pinning:

cat > /etc/apt/preferences.d/raspberrypi << EOF
Package: *
Pin: origin archive.raspberrypi.org
Pin-Priority: 1

Package: raspberrypi-bootloader
Pin: origin archive.raspberrypi.org
Pin-Priority: 1000

Package: libraspberrypi0
Pin: origin archive.raspberrypi.org
Pin-Priority: 1000

Package: Rasspberrypi-bin
Pin: origin archive.raspberrypi.org
Pin-Priority: 1000
EOF


Configurazione rete in DHCP:

cat > /etc/network/interfaces.d/eth0 << EOF
auto eth0
iface eth0 inet dhcp
EOF

Configurare fstab:

cat > /etc/fstab << EOF
/dev/mmcblk0p1 /boot vfat noatime 0 2
/dev/mmcblk0p2 / ext4 noatime 0 1
EOF


Configuarare file hosts

cat > /etc/hosts << EOF
127.0.0.1  localhost
127.0.1.1  RaspJessie
EOF


Creare utente e settare la password di root, quindi poi scaricare tutto quello che serve:

# adduser nome_utente
# passwd
# echo "RaspJessie" > /etc/hostname
# wget https://archive.raspberrypi.org/debian/raspberrypi.gpg.key -O - | apt-key add -
# apt-get update
# apt-get upgrade -y
# apt-get install -y mate-desktop-environment locales dbus openssh-server dosfstools libraspberrypi-bin
# apt-get clean


disabilitare orologio di sistema:

# systemctl enable systemd-timesyncd
# systemctl disable hwclock-save
# exit


Il sistema è pronto. La mia scheda microsd identificata come mmcblk0 ha due partizioni, la prima mmcblk0p1 è di 150M, e la seconda mmcblk0p2, con tutto il resto dello spazio. Si può usare gparted oppure il terminale:

$ sudo umount /dev/mmcblk0p1
$ sudo umount /dev/mmcblk0p2
$ sudo mkfs.vfat /dev/mmcblk0p1
$ sudo mkfs.ext4 /dev/mmcblk0p2

creazione e montaggio delle cartelle, ed infine copiare il sistema originale Debian Jessie sulla microsd:

$ sudo mkdir /mnt/{boot,system}
$ sudo mount /dev/mmcblk0p1 /mnt/boot
$ sudo mount /dev/mmcblk0p2 /mnt/system
$ sudo rsync -av rootfs/boot/ /mnt/boot
$ sudo rsync -av --exclude=/boot/* rootfs/ /mnt/system
$ sudo umount /mnt/{boot,system}


Adesso siamo pronti ad usare una Debian Jessie pura su raspberry pi 2. 

enjoy 😉


Installare Oracle VirtualBox 4.3 su Debian Wheezy/Jessie


Installare Oracle VirtualBox 4.3 su Debian Wheezy/Jessie


Oracle VirtualBox è un software open source per l'esecuzione di macchine virtuali. Supporta Windows, GNU/Linux e Mac OS X come sistemi operativi host, ed è in grado di eseguire Windows, GNU/Linux, OS/2 Warp, BSD come sistemi operativi guest. Per installare Oracle VirtualBox 4.3 su Debian Wheezy/jessie basta aggiungere i repository ufficiali al sources.list:


# sh -c 'echo "deb https://download.virtualbox.org/virtualbox/debian wheezy contrib" >> /etc/apt/sources.list'
# apt-get update
# wget -q https://www.virtualbox.org/download/oracle_vbox.asc -O- | apt-key add -
# apt-get update
# apt-get install virtualbox-4.3


enjoy 😉


Installare Adobe Reader su Debian Jessie 64 Bit


Installare Adobe Reader su Debian Jessie 64 Bit

Per installare Adobe Reader su Debian Wheezy/Jessie 64 BIT, bisogna abilitare il supporto al Multi-Arch. e poi procedere con l’installazione, scaricandolo da qua:


$ wget ftp://ftp.adobe.com/pub/adobe/reader/unix/9.x/9.5.5/enu/AdbeRdr9.5.5-1_i386linux_enu.deb
# dpkg --add-architecture i386
# apt-get update
# apt-get install libxml2:i386 libgtk2.0-0:i386  libstdc++6:i386
# dpkg -i AdbeRdr9*.deb
# apt-get install -f


enjoy 😉


Installare WordPress 4.1.1 su Debian Jessie


Installare WordPress 4.1.1 su Debian Jessie


Per installare WordPress 4.1.1 su Debian Jessie basta seguire questa semplice guida:


Installare LAMP:


# apt-get install apache2 mysql-server mysql-client php5 php5-mysql php5-gd php5-curl


verrà chiesto di scegliere una password per mysql. Una volta terminata l'installazione di tutto l'occorrente si può procedere con la preparazione del database, dove i parametri immessi nell'esempio sotto saranno i seguenti:

database=wpdb, user=wpuser, password=wppassword:


# mysql -u root -p


verrà chiesta la password di root per mysql, scelta in fase d'installazione, successivamente inserire linea per linea e dare invio:


CREATE DATABASE wpdb;
CREATE USER wpuser@localhost IDENTIFIED BY 'wppassword';
GRANT ALL PRIVILEGES ON wpdb.* TO wpuser@localhost;
FLUSH PRIVILEGES;
exit


riavviare i servizi:


# service apache2 restart
# service mysql restart


Scaricare wordpress, settare i permessi e configurare wp-config.php:


# cd /tmp/ && wget https://wordpress.org/latest.tar.gz
# tar -xvzf latest.tar.gz
# mv wordpress /var/www/html/
# chown -R www-data.www-data /var/www/html/wordpress
# chmod -R 755 /var/www/html/wordpress
# mkdir -p /var/www/html/wordpress/wp-content/uploads
# chown -R www-data.www-data /var/www/html/wordpress/wp-content/uploads
# cd /var/www/html/wordpress/
# cp wp-config-sample.php wp-config.php
# nano wp-config.php


che dovrà essere così:


// ** MySQL settings – You can get this info from your web host ** //
/** The name of the database for WordPress */
define('DB_NAME', 'wpdb');

/** MySQL database username */
define('DB_USER', 'root');

/** MySQL database password */
define('DB_PASSWORD', 'wppassword');

/** MySQL hostname */
define('DB_HOST', 'localhost');


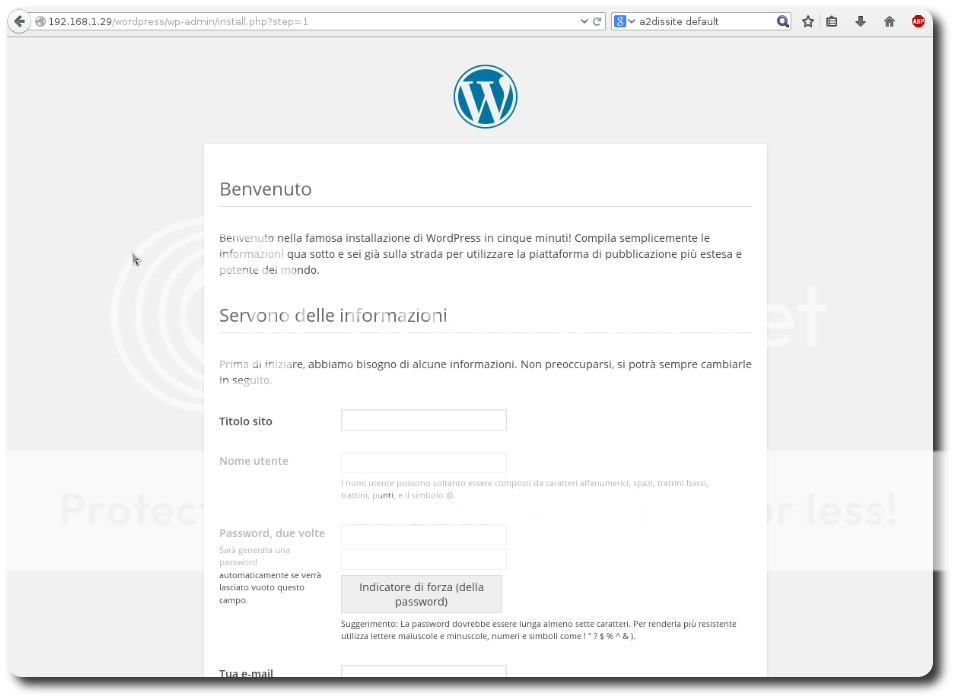
a questo punto basterà andare all'indirizzo https://localhost/wordpress/, per iniziare l'installazione guidata di WordPress, ed iniziare quindi con la creazione di un proprio blog.


enjoy 😉