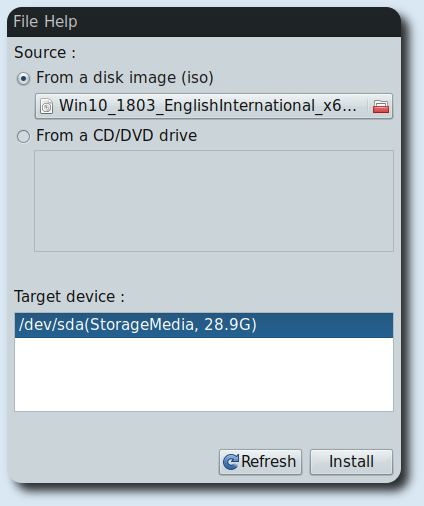
Creare una usb bootable Windows 10 da Gui Debian Guida su come creare una usb bootable con...
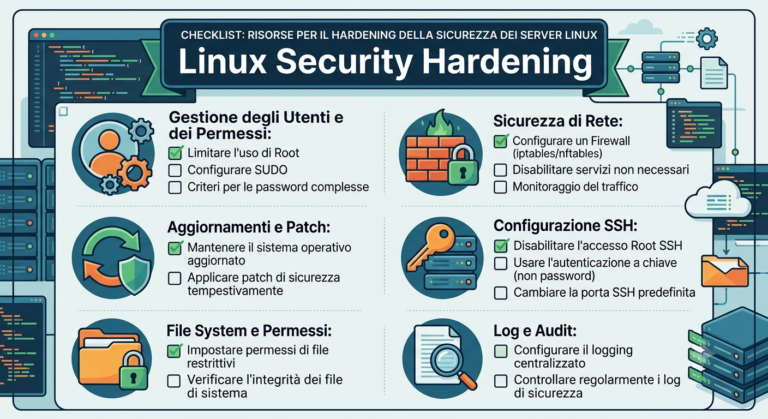
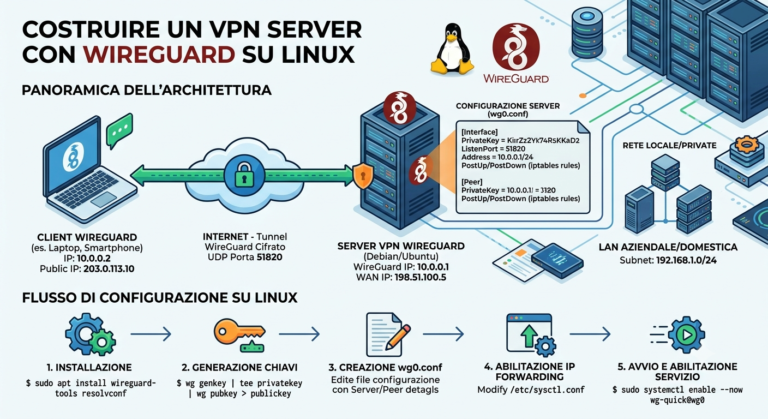
Debian
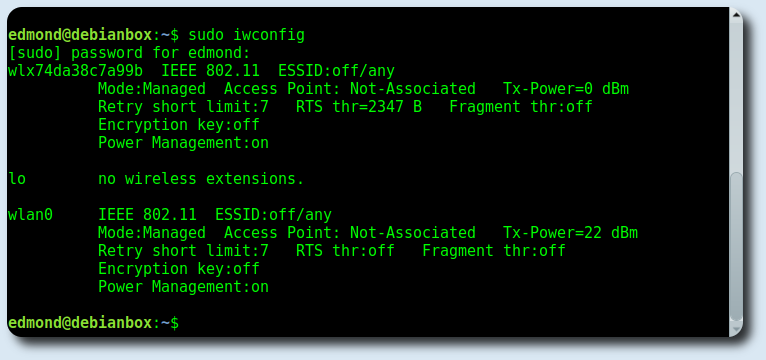
Connessione WPA2 WIFI da terminale con Wpa_Supplicant Guida su come connettersi ad una rete wifi da...
Telegram Messenger su Debian 9 Stretch Per installare Telegram Messenger su Debian 9 Stretch ci sono...

Creare una usb bootable Win10 da Debian 9 Per creare una usb bootable di Windows 10...

Dual Boot Debian FreeBSD Grub-Efi. Dopo l'installazione di FreeBSD a fianco di altri OS, se...
(Solved) /proc/devices: No entry for device-mapper found. Dopo aver compilato il kernel 4.8 su Debian...

OpenVPN con DD-WRT Debian ed iPhone con ios 10. Con l'arrivo di ios 10 non è...

Installare Oracle Java 8 su Debian Jessie/Strech. Di default su Debian Jessie viene installato OpenJDK Runtime...
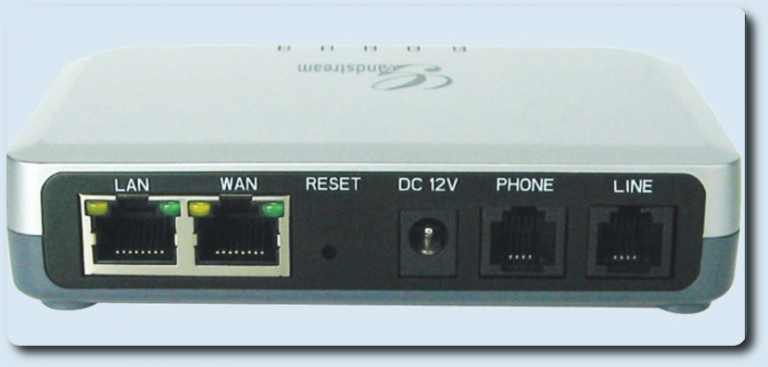
Configurazione Grandstream HT 503 con Asterisk e FreePBX. Questa guida mostra come configurare un Grandstream HT...

Wireshark abilitare interfacce di rete. In questa guida verranno descritti i passaggi per abilitare le...
Per avviare Tightvncserver al boot su Raspberry pi 2 e Debian Jessie, ma anche...
Per installare Mate su Debian Wheezy bisogna abilitare i repository backports: # apt-get install lsb-release...
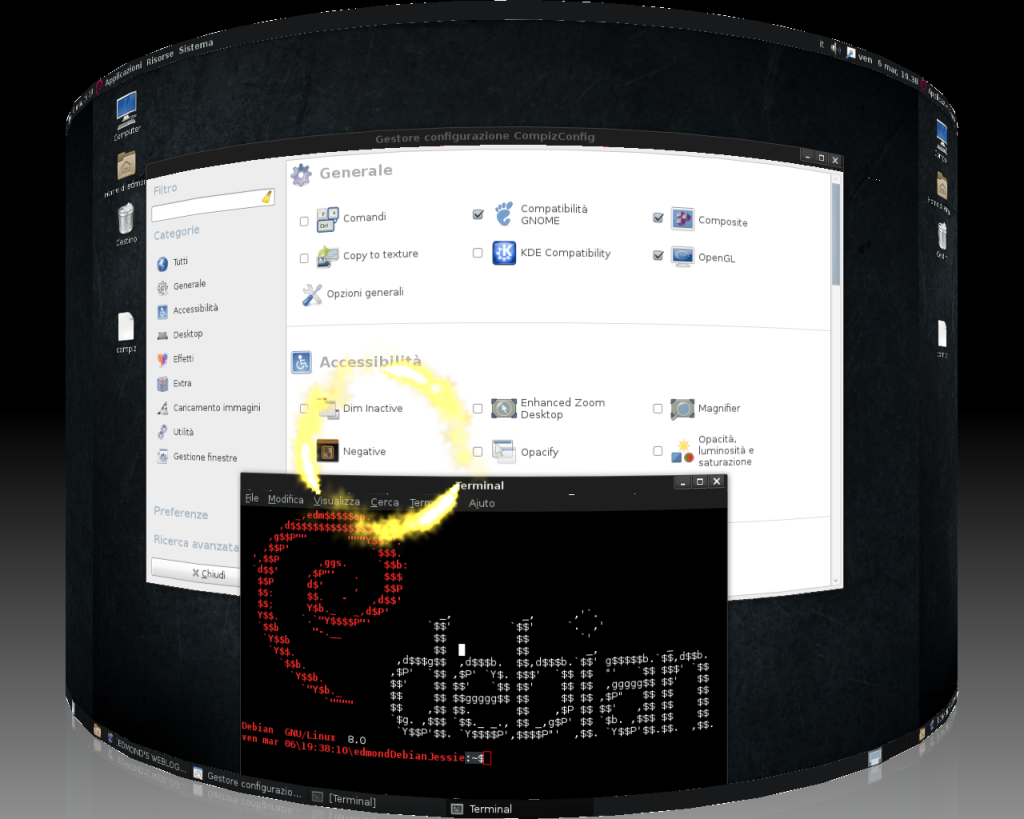
Per i nostalgici di Compiz, la bella notizia è che la versione...
Guida per installare Cisco VPN client su Debian Wheezy ed allo stesso tempo decriptare la password...