Backup incrementale con Tar


Backup incrementale con Tar


Backup incrementale con Tar è il titolo di questa guida, ma il sottotitolo potrebbe essere: come dormire sonni tranquilli facendo un backup incrementale, sicuro e veloce. Ci sono diversi strumenti con cui fare un backup dei propri dati, sia con programmi grafici, come luckyBackup, deja-dup o systemback-1.9.3, sia con strumenti da linea di comando, già presenti di default in Gnu-Linux. Tempo fa avevo gia fatto una guida sull’utilizzo di rsync come strumento di backup, invece questa guida mostrerà come ottenere un backup incrementale usando Tar.

Creazione di cartelle, sotto cartelle e files per testare il backup:

$ mkdir -p big-data/{backup,restore}
$ cd big-data/backup/
$ mkdir {1..4}
$ man ls > file1
$ man wc > file2
$ man tar > file3
$ man mv > file4
$ ls

output ls:

edmond@debianbox:~/Desktop/big-data/backup$ ls
1 2 3 4 file1 file2 file3 file4
$ cd ..
$ ls

output ls:

edmond@debianbox:~/Desktop/big-data$ ls
backup restore

Backup generale:

$ tar -czvg snapshot-file -f backup.tar.gz backup

output:

edmond@debianbox:~/Desktop/big-data$ tar -czvg snapshot-file -f backup.tar.gz backup
tar: backup: Directory is new
tar: backup/1: Directory is new
tar: backup/2: Directory is new
tar: backup/3: Directory is new
tar: backup/4: Directory is new
backup/
backup/1/
backup/2/
backup/3/
backup/4/
backup/file1
backup/file2
backup/file3
backup/file4

output ls:

edmond@debianbox:~/Desktop/big-data$ ls
backup backup.tar.gz restore snapshot-file

come si può vedere tutte le cartelle ed i files sono stati clonati nell’ archivio backup.tar.gz, mentre il file chiamato snapshot-file, si occuperà di tenere traccia dei cambiamenti. A questo punto il passo successivo sarà quello di andare ad inserire nella cartella di backup originale, altre cartelle e files così da testare il backup incrementale.

$ mkdir backup/{5..8} 
$ man sed > backup/file5 
$ ls backup/

output:

edmond@debianbox:~/Desktop/big-data$ ls backup/
1 2 3 4 5 6 7 8 file1 file2 file3 file4 file5

per ottenere un backup incrementale il comando da eseguire è come quello sopra, l’unica differenza sarà quella di personalizzare il nome del backup, in base alla data oppure con dei numeri:

$ tar -czvg snapshot-file -f 1-backup.tar.gz backup

output:

edmond@debianbox:~/Desktop/big-data$ tar -czvg snapshot-file -f 1-backup.tar.gz backup
tar: backup/5: Directory is new
tar: backup/6: Directory is new
tar: backup/7: Directory is new
tar: backup/8: Directory is new
backup/
backup/1/
backup/2/
backup/3/
backup/4/
backup/5/
backup/6/
backup/7/
backup/8/
backup/file5

per vedere le differenze dei due backup:

$ tar -tvf backup.tar.gz
$ tar -tvf 1-backup.tar.gz

output:

edmond@debianbox:~/Desktop/big-data$ tar -tvf backup.tar.gz
drwxr-xr-x edmond/edmond 41 2019-02-28 20:31 backup/
drwxr-xr-x edmond/edmond 1 2019-02-28 20:30 backup/1/
drwxr-xr-x edmond/edmond 1 2019-02-28 20:30 backup/2/
drwxr-xr-x edmond/edmond 1 2019-02-28 20:30 backup/3/
drwxr-xr-x edmond/edmond 1 2019-02-28 20:30 backup/4/
-rw-r--r-- edmond/edmond 7823 2019-02-28 20:30 backup/file1
-rw-r--r-- edmond/edmond 2026 2019-02-28 20:31 backup/file2
-rw-r--r-- edmond/edmond 45323 2019-02-28 20:31 backup/file3
-rw-r--r-- edmond/edmond 2989 2019-02-28 20:31 backup/file4
edmond@debianbox:~/Desktop/big-data$ tar -tvf 1-backup.tar.gz
drwxr-xr-x edmond/edmond 60 2019-02-28 20:51 backup/
drwxr-xr-x edmond/edmond 1 2019-02-28 20:30 backup/1/
drwxr-xr-x edmond/edmond 1 2019-02-28 20:30 backup/2/
drwxr-xr-x edmond/edmond 1 2019-02-28 20:30 backup/3/
drwxr-xr-x edmond/edmond 1 2019-02-28 20:30 backup/4/
drwxr-xr-x edmond/edmond 1 2019-02-28 20:50 backup/5/
drwxr-xr-x edmond/edmond 1 2019-02-28 20:50 backup/6/
drwxr-xr-x edmond/edmond 1 2019-02-28 20:50 backup/7/
drwxr-xr-x edmond/edmond 1 2019-02-28 20:50 backup/8/
-rw-r--r-- edmond/edmond 11183 2019-02-28 20:51 backup/file5

Ripristino Backup nella cartella restore:

$ tar -xvf 1-backup.tar.gz -C restore/

enjoy 😉


Muovere files diversi simultaneamente da terminale

Muovere files diversi simultaneamente da terminale

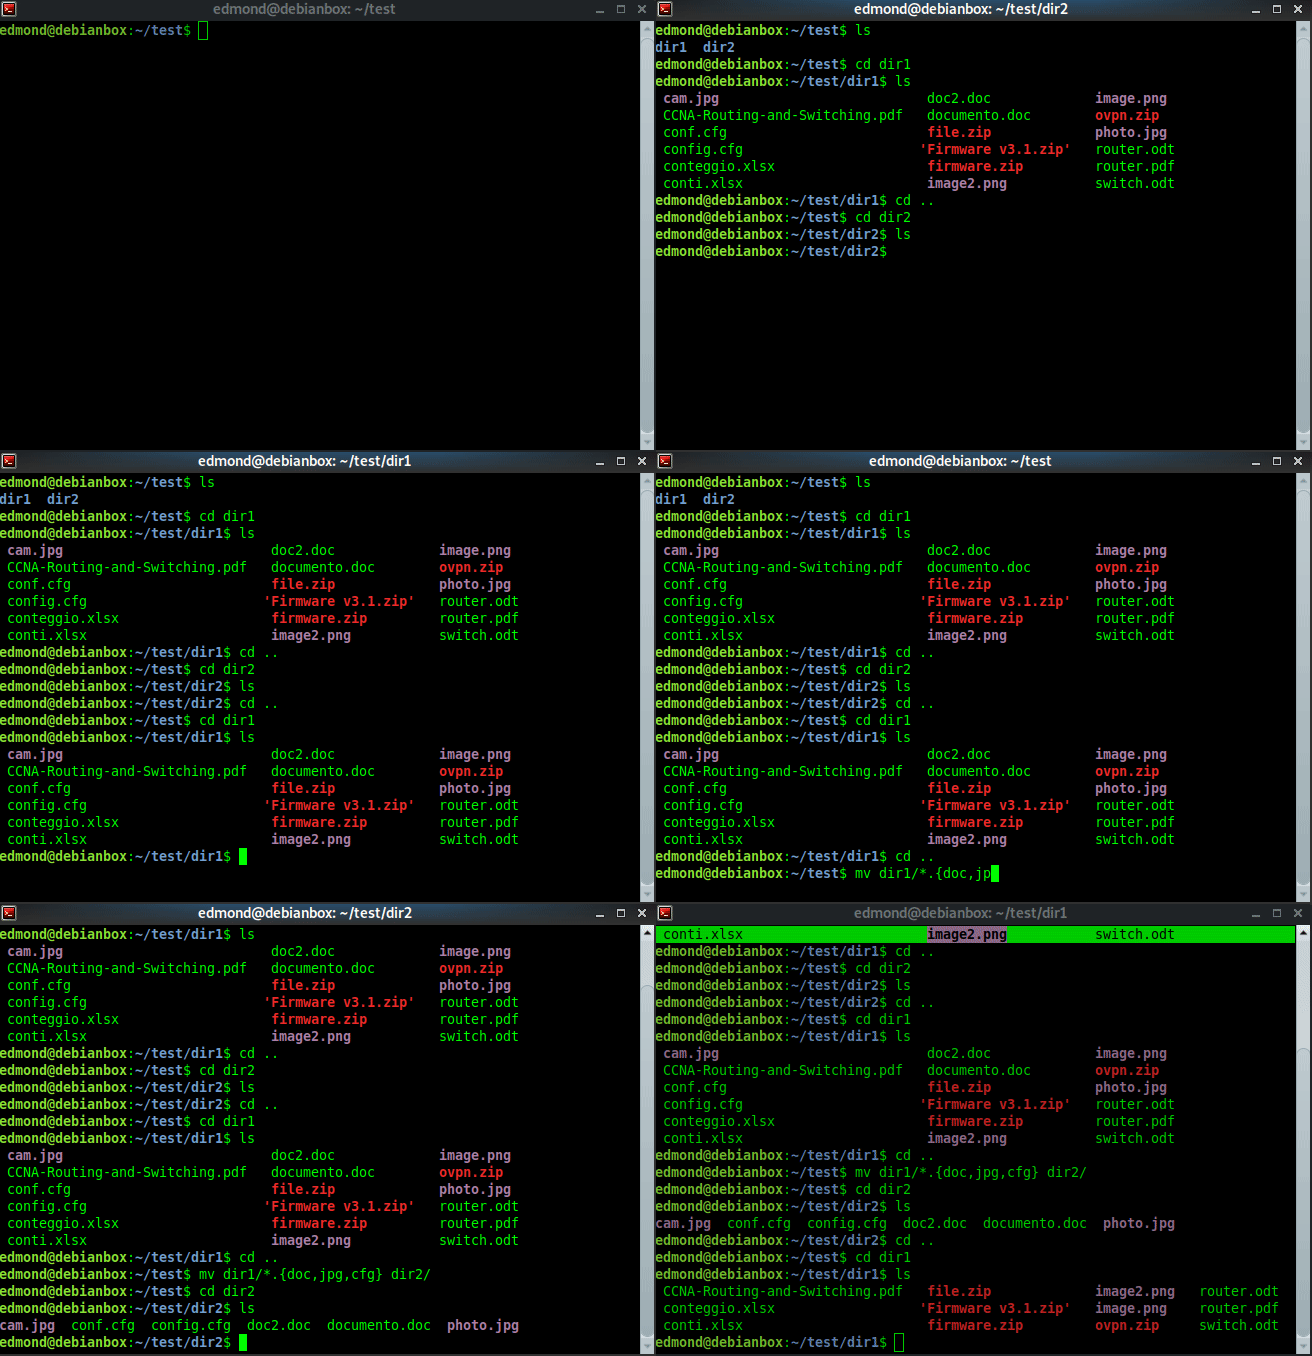
Guida su come muovere files con estensione diversa da una directory ad un’altra. Può capitare di avere all’interno di una directory centinaia di files, ma se si necessita di muoverne solo alcuni. Il comando mv sotto può venerci incontro:

$ mv dir1/*.{doc,pdf,jpg} dir2/

enjoy 😉

Trovare profili Social col riconoscimento immagine

trovare profili Social col riconoscimento immagine

Come trovare profili Social col riconoscimento immagine, utilizzando Eagle Eye su Debian 1o. L’obiettivo sarà quello di partire da una immagine, e tramite una scansione della rete trovare i profili social, come Facebook, Instagram, Pinterest e Twitter.

$ sudo apt update; sudo apt upgrade -y
$ sudo apt install build-essential devscripts cmake python3-pip git python3 python3-dev libffi-dev libgtk-3-dev libboost-all-dev
$ git clone https://github.com/ThoughtfulDev/EagleEye
$ cd EagleEye
$ sudo pip3 install -r requirements.txt
$ sudo pip3 install --upgrade beautifulsoup4 html5lib spry

Scaricare geckodriver

$ wget https://github.com/mozilla/geckodriver/releases/download/v0.23.0/geckodriver-v0.23.0-linux64.tar.gz
$ tar xvf geckodriver-v0.23.0-linux64.tar.gz
$ chmod +x geckodriver
$ sudo mv geckodriver /usr/bin/

per avviare Eagle Eye

$ cd EagleEye
$ python3 eagle-eye.py

di seguito un video screen fatto da me che ne mostra il funzionamento:

enjoy 😉


Anonsurf su Debian 10

Anonsurf su Debian 10

Anonsurf su Debian 10

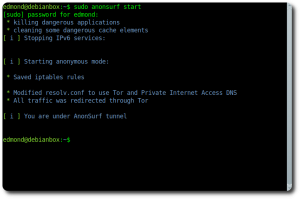
Anonsurf è la modalità anonima di ParrotOS per forzare le connessioni attraverso Tor e/o la rete i2p.  Tor è un protocollo di crittografia SOCKS4 e SOCKS5. Tor esegue il tunnelling di tutto il traffico che circola nella rete dell’utente in modo anonimo. Tor nasconde la posizione di un utente e i dati di rete da chiunque monitora l’utente localmente e in remoto. L’utilizzo di Anonsurf si può avviare anche da terminale, ed oltre ad essere integrato in ParrotOS ed in Kali Linux, si può installare in Debian 9 Stretch o Debian 10 Buster.

$ sudo apt install git
$ git clone https://github.com/ParrotSec/anonsurf
$ cd anonsurf/
$ chmod a+x ./anonsurf.sh
$ sudo ./anonsurf.sh start

Anonsurf su Debian 10i comandi sono i seguenti:

anonsur start - Start system-wide TOR tunnel
anonsurf stop - Stop anonsurf and return to clearnet
anonsurf restart - Combines "stop" and "start" options
anonsurf changeid - Restart TOR to change identity
anonsurf status - Check if AnonSurf is working properly
anonsurf myip - Check your ip and verify your tor connection
anonsurf mymac - Check your mac and verify your change mac address

enjoy 😉

Video utilizzo Systemback-1.9.3


Video utilizzo Systemback-1.9.3

Questo video mostra come installare una copia del proprio OS, utilizzando Systemback-1.9.3. Nell’esempio sopra, utilizzo Ubuntu 18-04, installato in EFI mode. Nel caso si trattasse di una installazione in legacy mode, assicurarsi che il pacchetto grub-pc-bin sia installato correttamente, sopratutto se si parte da chiavetta usb live.

enjoy 😉

Server DHCP su Debian 10 Buster

Server DHCP su Debian 10 Buster

Server DHCP su Debian 10 Buster. Installazione e configurazione di un server dhcp su Debian Buster:

# apt install isc-dhcp-server

settare la scheda di rete da utilzzare, nel mio caso eth0:

# nano /etc/default/isc-dhcp-server
# Defaults for isc-dhcp-server initscript
# sourced by /etc/init.d/isc-dhcp-server
# installed at /etc/default/isc-dhcp-server by the maintainer scripts

#
# This is a POSIX shell fragment
#

# Path to dhcpd's config file (default: /etc/dhcp/dhcpd.conf).
#DHCPD_CONF=/etc/dhcp/dhcpd.conf

# Path to dhcpd's PID file (default: /var/run/dhcpd.pid).
#DHCPD_PID=/var/run/dhcpd.pid

# Additional options to start dhcpd with.
#       Don't use options -cf or -pf here; use DHCPD_CONF/ DHCPD_PID instead
#OPTIONS=""

# On what interfaces should the DHCP server (dhcpd) serve DHCP requests?
#       Separate multiple interfaces with spaces, e.g. "eth0 eth1".
INTERFACES="eth0"

poi modificare il file dhcpd.conf inserendo i parametri della nostra rete, nel mio caso 192.168.100.0/24:

# nano /etc/dhcp/dhcpd.conf
# Sample configuration file for ISC dhcpd for Debian
#
#

# The ddns-updates-style parameter controls whether or not the server will
# attempt to do a DNS update when a lease is confirmed. We default to the
# behavior of the version 2 packages ('none', since DHCP v2 didn't
# have support for DDNS.)
ddns-update-style none;

# option definitions common to all supported networks...
option domain-name "example.org";
option domain-name-servers ns1.example.org, ns2.example.org;
default-lease-time 600;
max-lease-time 7200;

# If this DHCP server is the official DHCP server for the local
# network, the authoritative directive should be uncommented.
#authoritative;

# Use this to send dhcp log messages to a different log file (you also
# have to hack syslog.conf to complete the redirection).
log-facility local7;

# No service will be given on this subnet, but declaring it helps the
# DHCP server to understand the network topology.

#subnet 10.152.187.0 netmask 255.255.255.0 {
#}

# This is a very basic subnet declaration.
subnet 192.168.100.0 netmask 255.255.255.0 {
range 192.168.100.150 192.168.100.160;
option routers 192.168.100.1;
option subnet-mask 255.255.255.0;
option broadcast-address 192.168.100.254;
option domain-name-servers 192.168.100.1, 192.168.100.2;
option ntp-servers 192.168.100.1;
option netbios-name-servers 192.168.100.1;
option netbios-node-type 8;
}
#subnet 10.254.239.0 netmask 255.255.255.224 {
#  range 10.254.239.10 10.254.239.20;
#  option routers rtr-239-0-1.example.org, rtr-239-0-2.example.org;
#}

# This declaration allows BOOTP clients to get dynamic addresses,
# which we don't really recommend.

#subnet 10.254.239.32 netmask 255.255.255.224 {
#  range dynamic-bootp 10.254.239.40 10.254.239.60;
#  option broadcast-address 10.254.239.31;
#  option routers rtr-239-32-1.example.org;
#}

# A slightly different configuration for an internal subnet.
#subnet 10.5.5.0 netmask 255.255.255.224 {
#  range 10.5.5.26 10.5.5.30;
#  option domain-name-servers ns1.internal.example.org;
#  option domain-name "internal.example.org";
#  option routers 10.5.5.1;
#  option broadcast-address 10.5.5.31;
#  default-lease-time 600;
#  max-lease-time 7200;
#}

# Hosts which require special configuration options can be listed in
# host statements.   If no address is specified, the address will be
# allocated dynamically (if possible), but the host-specific information
# will still come from the host declaration.

#host passacaglia {
#  hardware ethernet 0:0:c0:5d:bd:95;
#  filename "vmunix.passacaglia";
#  server-name "toccata.fugue.com";
#}

# Fixed IP addresses can also be specified for hosts.   These addresses
# should not also be listed as being available for dynamic assignment.
# Hosts for which fixed IP addresses have been specified can boot using
# BOOTP or DHCP.   Hosts for which no fixed address is specified can only
# be booted with DHCP, unless there is an address range on the subnet
# to which a BOOTP client is connected which has the dynamic-bootp flag
# set.
#host fantasia {
#  hardware ethernet 08:00:07:26:c0:a5;
#  fixed-address fantasia.fugue.com;
#}

# You can declare a class of clients and then do address allocation
# based on that.   The example below shows a case where all clients
# in a certain class get addresses on the 10.17.224/24 subnet, and all
# other clients get addresses on the 10.0.29/24 subnet.

#class "foo" {
#  match if substring (option vendor-class-identifier, 0, 4) = "SUNW";
#}

#shared-network 224-29 {
#  subnet 10.17.224.0 netmask 255.255.255.0 {
#    option routers rtr-224.example.org;
#  }
#  subnet 10.0.29.0 netmask 255.255.255.0 {
#    option routers rtr-29.example.org;
#  }
#  pool {
#    allow members of "foo";
#    range 10.17.224.10 10.17.224.250;
#  }
#  pool {
#    deny members of "foo";
#    range 10.0.29.10 10.0.29.230;
#  }
#}

dopo le modifiche riavviare il servizio:

# systemctl restart isc-dhcp-server.service
Server DHCP su Debian Buster

enjoy ?

Installare VirtualBox 6.0 su Debian 9

Installare VirtualBox 6.0 su Debian 9Guida su come installare Oracle Virtualbox 6.0 su Debian 9 Stretch e Debian 10 Testing/Buster, testata e funzionante.

Aggiornare il sistema:
$ sudo apt update
$ sudo apt upgrade -y
Importare le chiavi ed aggiungere i repository:
$ wget -q https://www.virtualbox.org/download/oracle_vbox_2016.asc -O- | sudo apt-key add -
$ wget -q https://www.virtualbox.org/download/oracle_vbox.asc -O- | sudo apt-key add -
$ echo "deb [arch=amd64] http://download.virtualbox.org/virtualbox/debian $(lsb_release -sc) contrib" | sudo tee /etc/apt/sources.list.d/virtualbox.list
Installare VirtualBox e VirtualBox Exstension Pack:
$ sudo apt update
$ sudo apt install linux-headers-$(uname -r) dkms
$ sudo apt-get install virtualbox-6.0
$ wget https://download.virtualbox.org/virtualbox/6.0.0/Oracle_VM_VirtualBox_Extension_Pack-6.0.0.vbox-extpack

per installare VirtualBox Exstension Pack basta un doppio click sul file scaricato precedentemente.

enjoy 😉

Raspberry con Owncloud Letsencrypt Apache

Raspberry con Owncloud Letsencrypt Apache

L’obiettivo di questa guida è quello di realizzare un proprio server owncloud, e nello specifico io utilizzerò un raspberry pi 3 , ma in alternativa si potrà utilizzare un’altro modello di single board o Pc, con OS Debian based. Avevo gia fatto una guida precedentemente, ma in quell’occasione avevo utilizzato un certificato auto firmato, che chiaramente i browser vedono come non sicuro. In questo caso invece utilizzerò Let’s Encrypt che fornisce certificati SSL gratuiti tramite un processo completamente automatizzato, progettato per eliminare la creazione manuale di certificati, per la convalida, l’installazione e il rinnovo. I certificati rilasciati da Let’s Encrypt sono validi per 90 giorni dalla data di emissione e sono oggi considerati affidabili da tutti i principali browser.

Prerequisiti ed info

  • Negli esempi sotto utilizzerò come nome di dominio example.com ed i comandi verranno eseguiti da root
  • Il raspberry dovrà avere quindi come dominio l’equivalente di example.com. Questo può essere modificato in /etc/hostname e poi riavviare.
  • Il vostro ip pubblico dovrà puntare quindi al dominio, nel caso non si avesse un ip pubblico, utilizzare un servizio di DNS.
  • Assicurarsi prima di aprire le porte 80/443 verso il proprio server, altrimenti non si potranno ottenere i certificati. Successivamente rimarrà aperta solo la 443.
  • La guida è stata testata su una installazione pulita di Raspbian Stretch
Raspberry con Owncloud Letsencrypt Apache

Step 1) Installare i pacchetti necessari:

$ sudo su
# apt update; apt upgrade
# apt install apache2 mariadb-server libapache2-mod-php7.0 php7.0-gd php7.0-json php7.0-mysql php7.0-curl php7.0-intl php7.0-mcrypt php-imagick php7.0-zip php7.0-xml php7.0-mbstring ntfs-3g fail2ban certbot

Step 2) Configurazione Apache e Virtual Host basic

# rm -rf /var/www/html/
# mkdir -p /var/www/example.com/public_html
# nano /var/www/example.com/public_html/index.html

ed incollare dentro:

<!DOCTYPE html>
<html lang="en" dir="ltr">
<head>
<meta charset="utf-8">
<title>Welcome to example.com</title>
</head>
<body>
<h1>Success! example.com home page!</h1>
</body>
</html
# nano /etc/apache2/sites-available/example.com.conf

ed incollare dentro:

<VirtualHost *:80>
ServerName example.com
ServerAlias www.example.com
ServerAdmin webmaster@example.com
DocumentRoot /var/www/example.com/public_html

<Directory /var/www/example.com/public_html>
Options -Indexes +FollowSymLinks
AllowOverride All
</Directory>

ErrorLog ${APACHE_LOG_DIR}/example.com-error.log
CustomLog ${APACHE_LOG_DIR}/example.com-access.log combined
</VirtualHost>

poi:

# chown -R www-data: /var/www/example.com/
# mv /etc/apache2/sites-available/000-default.conf 000-default.conf.bak
# mv /etc/apache2/sites-enabled/000-default.conf 000-default.conf.bak
# a2ensite example.com
# systemctl restart apache2
# systemctl enable apache2

a questo punto collegandosi al server dovremmo vedere che funziona: Raspberry con Owncloud Letsencrypt ApacheStep 3) Chiave e Letsencrypt Creare una chiave robusta Dh (Diffie-Hellman) a 2048 bit, ci vorrà circa 20 minuti.

# openssl dhparam -out /etc/ssl/certs/dhparam.pem 2048

Per ottenere i certificati utilizzeremo certbot, installato precedentemente, che si occuperà dell’acquisizione e del rinnovo degli stessi. Utilizzeremo il plug-in Webroot che funziona creando un file temporaneo nella ${webroot-path}/.well-known/acme-challenge a cui si collegherà Letsencrypt per risolvere il DNS:

# mkdir -p /var/lib/letsencrypt/.well-known
# chgrp www-data /var/lib/letsencrypt
# chmod g+s /var/lib/letsencrypt

creare primo file di configurazione:

# nano /etc/apache2/conf-available/letsencrypt.conf

ed incollare dentro:

Alias /.well-known/acme-challenge/ "/var/lib/letsencrypt/.well-known/acme-challenge/"
<Directory "/var/lib/letsencrypt/">
AllowOverride None
Options MultiViews Indexes SymLinksIfOwnerMatch IncludesNoExec
Require method GET POST OPTIONS
</Directory>

creare secondo file raccomandato:

# nano /etc/apache2/conf-available/ssl-params.conf

ed incollare dentro:

SSLCipherSuite EECDH+AESGCM:EDH+AESGCM:AES256+EECDH:AES256+EDH
SSLProtocol All -SSLv2 -SSLv3 -TLSv1 -TLSv1.1
SSLHonorCipherOrder On
Header always set Strict-Transport-Security "max-age=63072000; includeSubDomains; preload"
Header always set X-Frame-Options DENY
Header always set X-Content-Type-Options nosniff
# Requires Apache >= 2.4
SSLCompression off
SSLUseStapling on
SSLStaplingCache "shmcb:logs/stapling-cache(150000)"
# Requires Apache >= 2.4.11
SSLSessionTickets Off

abilitare moduli e files di configurazione:

# a2enmod ssl
# a2enmod headers
# a2enmod http2
# a2enconf letsencrypt
# a2enconf ssl-params
# systemctl reload apache2

a questo punto siamo pronti ad ottenere i certificati SSL utilizzando certbot:

# certbot certonly --agree-tos --email admin@example.com --webroot -w /var/lib/letsencrypt/ -d example.com -d www.example.com

se tutto è andato bene visualizzeremo questo:

IMPORTANT NOTES:
- Congratulations! Your certificate and chain have been saved at
/etc/letsencrypt/live/example.com/fullchain.pem.
Your cert will expire on 2019-02-28. To obtain a new or tweaked
version of this certificate in the future, simply run certbot
again. To non-interactively renew *all* of your certificates, run
"certbot renew"
- If you lose your account credentials, you can recover through
e-mails sent to xxxxxxx@gmail.com.
- Your account credentials have been saved in your Certbot
configuration directory at /etc/letsencrypt. You should make a
secure backup of this folder now. This configuration directory will
also contain certificates and private keys obtained by Certbot so
making regular backups of this folder is ideal.
- If you like Certbot, please consider supporting our work by:

Donating to ISRG / Let's Encrypt: https://letsencrypt.org/donate
Donating to EFF: https://eff.org/donate-le

adesso andiamo a riconfigurare il file Virtual Host come sotto:

# nano /etc/apache2/sites-available/example.com.conf
ed incollare dentro:
 
<VirtualHost *:80> 
ServerName example.com
ServerAlias www.example.com

Redirect permanent / https://example.com/
</VirtualHost>

<VirtualHost *:443>
ServerName example.com
ServerAlias www.example.com

Protocols h2 http:/1.1

<If "%{HTTP_HOST} == 'www.example.com'">
Redirect permanent / https://example.com/
</If>

DocumentRoot /var/www/example.com/public_html
ErrorLog ${APACHE_LOG_DIR}/example.com-error.log
CustomLog ${APACHE_LOG_DIR}/example.com-access.log combined

SSLEngine On
SSLCertificateFile /etc/letsencrypt/live/example.com/cert.pem
SSLCertificateKeyFile /etc/letsencrypt/live/example.com/privkey.pem
SSLCertificateChainFile /etc/letsencrypt/live/example.com/chain.pem


</VirtualHost>
ricaricare la nuova configurazione:
 
# systemctl reload apache2
adesso si può fare un TEST SSL

Rinnovo automatico dei certificati: Come dicevo all’inizio, i certificati di Let’s Encrypt hanno una durata di 90 giorni, dopodichè bisognerà rinnovarli. Per automatizzare il rinnovo utilizzare un cronjob:
# nano /etc/cron.d/certbot
ed incollare dentro:
0 */12 * * * root test -x /usr/bin/certbot -a \! -d /run/systemd/system && perl -e 'sleep int(rand(3600))' && certbot -q renew --renew-hook "systemctl reload apache2"
Rinnovo manuale:
# certbot renew --dry-run
Raspberry con Owncloud Letsencrypt Apache
Step 4) Installazione Owncloud
# cd /tmp
# wget https://download.owncloud.org/community/owncloud-10.0.10.tar.bz2
# tar -xvf owncloud-10.0.10.tar.bz2
# chown -R www-data:www-data owncloud
# mv owncloud /var/www/example.com/public_html/
# rm /var/www/example.com/public_html/index.html
# nano /etc/apache2/sites-available/example.com.conf
e fare puntare la DocumentRoot ad owncloud:
DocumentRoot /var/www/example.com/public_html/owncloud
Creazione database ed user mysql:
# mysql -u root -p
inserire password di root, e poi i 5 comandi sotto, e settare la password per l’utente owncloud
 
1) create database owncloud;
2) create user owncloud@localhost identified by ‘password‘;
3) grant all privileges on owncloud.* to owncloud@localhost identified by ‘password‘;
4) flush privileges;
5) exit;
 
fare una modifica al file php.ini, nella sezione File Uploads, portando upload_max_filesize = 5000M.
# nano /etc/php/7.0/apache2/php.ini
come ultimo ritocco, aumentare la capacità di upload, andando a modificare il file .user.ini
# nano /var/www/example.com/public_html/owncloud/.user.ini
portando: upload_max_filesize, e post_max_size a 5000M
# systemctl restart apache2
a questo punto il server owncloud è installato, mancano solo un paio di ritocchi per evitare alcuni alert in owncloud:
# nano /etc/apache2/sites-available/example.com.conf
ed incollare dentro:
<IfModule mod_headers.c>
Header always set Strict-Transport-Security "max-age=15552000; includeSubDomain$
</IfModule>
# nano /etc/apache2/conf-available/ssl-params.conf
e commentare tutti gli Header:
SSLCipherSuite EECDH+AESGCM:EDH+AESGCM:AES256+EECDH:AES256+EDH
SSLProtocol All -SSLv2 -SSLv3 -TLSv1 -TLSv1.1
SSLHonorCipherOrder On
#Header always set Strict-Transport-Security "max-age=63072000; includeSubDomai$
#Header always set X-Frame-Options DENY
#Header always set X-Content-Type-Options nosniff
# Requires Apache >= 2.4
SSLCompression off
SSLUseStapling on
SSLStaplingCache "shmcb:logs/stapling-cache(150000)"
# Requires Apache >= 2.4.11
SSLSessionTickets Off

SSLOpenSSLConfCmd DHParameters "/etc/ssl/certs/dhparam.pem"
# systemctl restart apache2
Owncloud è installato ed è raggiungibile all’indirizzo https://example.com. Se si volesse utilizzare come storage un disco esterno, la guida continua: Step 5) Creazione della cartella di storage e relativi permessi:
# mkdir /media/owncloud-usb
# groupadd www-data
# usermod -a -G www-data www-data
# chown -R www-data:www-data /media/owncloud-usb
# chmod -R 775 /media/owncloud-usb
adesso abbiamo bisogno di conoscere UUID del disco usb ed user e group di www-data, che serviranno per configurare /etc/fstab per il montaggio automatico:
# id -u www-data; id -g www-data
# blkid
# nano /etc/fstab
ed aggiungere in una sola riga qualcosa del genere in /etc/fstab:
UUID=32E49E5027A4F8A7 /media/owncloud-usb auto nofail,uid=33,gid=33,umask=0027$,dmask=0027,noatime 0 0
# reboot
Se tutto è andato bene andare all’indirizzo https://ip_dominio_del_server ed apparirà la pagina iniziale, dove si dovrà inserire nome utente e password per l’accesso al server owncloud, nome del database, user e password dell’utente owncloud, ed infine il punto di mount. Username: owncloud Password: password Database: owncloud Server: localhost Raspberry con Owncloud Letsencrypt Apache
Raspberry con Owncloud Letsencrypt Apache
enjoy 😉  

Creare una usb bootable Windows 10 da Gui Debian

Creare una usb bootable Windows 10 da Gui DebianCreare una usb bootable Windows 10 da Gui Debian

Guida su come creare una usb bootable con Windows 10 direttamente da Debian 9/10 utilizzando WoeUSB come Gui. Precedentemente avevo già fatto una guida, per lo stesso scopo, ma utilizzando solamente il terminale. Questo metodo è molto più semplice e veloce:

sudo apt install devscripts equivs git python3-pip
git clone https://github.com/slacka/WoeUSB.git
cd WoeUSB/
./setup-development-environment.bash
mk-build-deps
sudo dpkg -i woeusb-build-deps_*
dpkg-buildpackage -uc -b
sudo dpkg -i ../woeusb*.deb

in caso di problemi con le dipendenze digitare:

sudo apt install -f

enjoy 😉

Installare Oracle Java 10 su Debian 9-10 via APT

Installare Oracle Java 10 su Debian 9/10 via APTInstallare Oracle Java 10 su Debian 9-10 via APT

Ci sono diversi modi per installare Oracle Java su Debian, ma quello più comodo è aggiungere i repository di Linux Uprising:

ed usare apt:

sudo apt update
sudo apt upgrade -y
sudo apt install software-properties-common
sudo add-apt-repository ppa:linuxuprising/java
sudo apt update
sudo apt-key adv --keyserver keyserver.ubuntu.com --recv-keys EA8CACC073C3DB2A
sudo apt update
sudo apt install -y oracle-java10-installer
sudo update-alternatives --config java
sudo update-alternatives --config javac
sudo update-alternatives --config javaws

output:

edmond@debianbox:~$ sudo update-alternatives --config java
There are 3 choices for the alternative java (providing /usr/bin/java).

Selection Path Priority Status
------------------------------------------------------------
0 /usr/local/oracle-java-8/jdk1.8.0_191/bin/java 1500 auto mode
* 1 /usr/lib/jvm/java-10-oracle/bin/java 1091 manual mode
2 /usr/lib/jvm/java-8-openjdk-amd64/jre/bin/java 1081 manual mode
3 /usr/local/oracle-java-8/jdk1.8.0_191/bin/java 1500 manual mode

Press <enter> to keep the current choice[*], or type selection number:

Installare Oracle Java 10 su Debian 9-10 via APT

enjoy 😉